Defining an Email Action
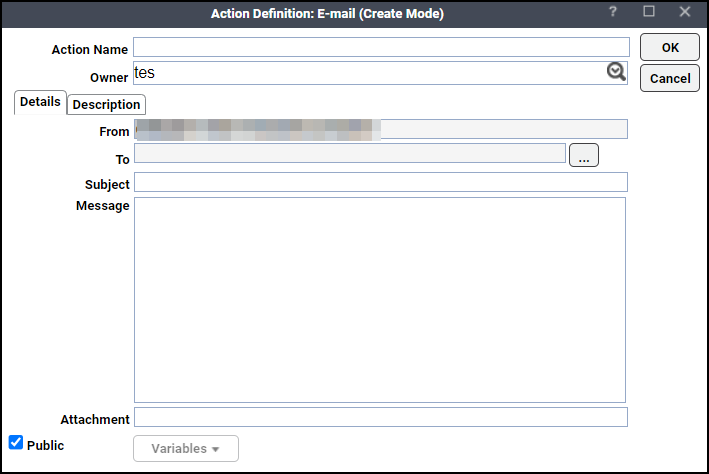
The Action Definition: Email dialog displays when creating or editing an existing email message action. An email action sends an email message in response to a job event or system event. You can send email to any individual or group with a valid email address in the mail system you have chosen. The individual does not have to be a user of TA.
Note: To send email to a TA workgroup, that workgroup (not just the individual members) must have a mailbox or be defined as a mailing list in your email system. For help setting up a mailbox or mailing list, see your system or mail administrator.
To define an email action:
-
Click Definitions > Actions > Email on the Navigation pane to display the Email Actions pane. Email actions available to you and your workgroups are sorted and displayed in alphabetical order.
-
Click Add and choose Add Email Action from the context menu to display the Email Action Definition dialog.
-
Click the Action Name field, and then type a name for this action (up to 30 characters). The name must be unique.
-
Click the Public option to make the action public. When an action is public, the action is available to all TA users, within the bounds of their security policy.
-
Choose the desired Owner from the list in the Owner field.
-
Click the Details tab.
-
Click Ellipsis in the To field to display the Mailing List dialog.
-
Choose the recipients of this email action when it is triggered, then click OK.
-
Click the Subject field, and type a subject title for your email message. You can insert one or more TA variables.
To insert a variable, click where you want to insert the variable, and then click Variables, and choose a variable from the variables context menu.
-
Click the Message field, type the message to send when this email action is triggered. You can insert one or more TA variables.
To insert a variable, click where you want the variable, and then click Variables, and choose a variable from the variables context menu.
-
Click the Description tab to enter a description for your email action, and type your description in the Description field.
-
Click OK to accept the action. The action displays in the Actions pane and is available from the Job Event Definition and System Events dialogs.