Defining an Email Event
An event monitor can be defined to scan email originating from a designated IMAP or POP3 server for specified text. The subject, sender, and body of the email and any text file attachments are scanned for a match to the designated text. Once an email that meets the monitor’s criteria is detected, the email monitor either marks the email as read, moves it to a folder or deletes the email. The detection of such an email can be used to trigger an associated action.
To monitor email on an email server, a connection to that email server must be defined.
To define an Email event:
-
Click Definitions > Events > Email on the Navigation pane to display the Email Events pane. Email events available to you and your workgroups are sorted and displayed in alphabetical order.
-
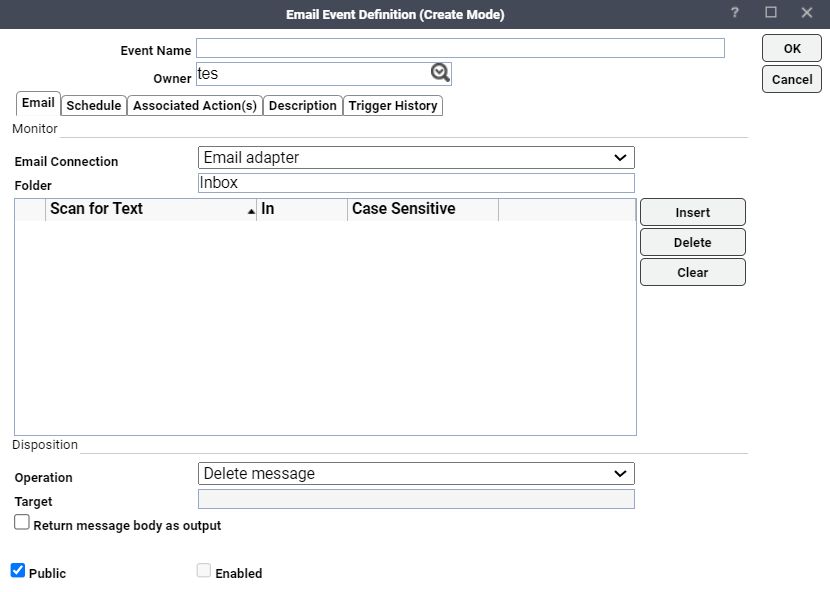
Click Add and choose Add Email Event from the context menu to display the Email Event Definition dialog.
-
Enter a name for the email event in the Event Name box.
Note: By default, the user defining the event is the Owner but you can choose one of the other listed users from the list as the owner.
-
Click a connection to an Exchange server in the Email Connection list.
Note: The connection must be already defined before it will appear in the list.
-
Click the Folder field, enter the name of the monitored account target folder.
-
Designate what text is to be considered an event when it is detected. Click Insert to add a line to the Conditions section.
-
In the Scan for Text column, enter a text string that the monitor will scan for in the email going to the designated mail account.
-
In the In column, choose from the list where in the email that the monitor should look for the text.
-
In the Case Sensitive column, designate whether the text match is dependent upon case.
-
-
Click the Disposition section, choose what will occur once the monitor detects the specified text.
-
In the Operation list, choose an option.
-
If you choose the Move message to folder option, in the Target field, enter the path to the folder where you want the message stored.
-
If you want to access the message text from within TA , choose the Return message body to Scheduler option.
-
-
Click OK to save the definition.