Using the JD Edwards Adapter
This section provides instructions for defining a JD Edwards job in TA and describes the various options that can be included in the jobs.
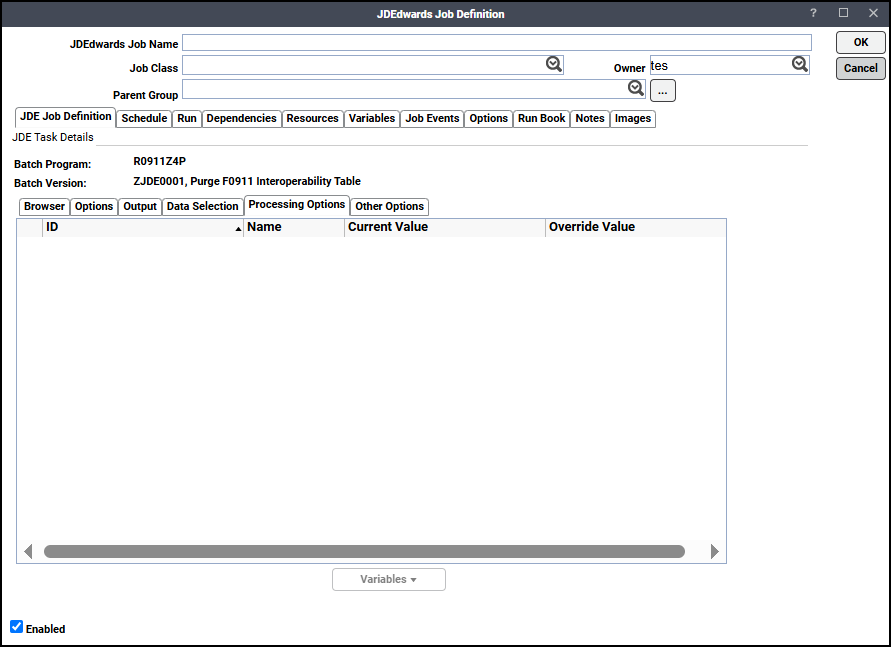
JD Edwards Job Definition
You define jobs to run JD Edwards batch versions, consisting of UBE programs and corresponding collections of data selection and processing options. This section describes the basic steps for defining a JD Edwards job.
To define a JD Edwards job:
-
Click Definitions > Jobs on the Navigator pane to display the Jobs pane.
-
Right-click Jobs.
-
Click Add > JDEdwards Job.

The Run tab opens first when defining a new JD Edwards job. Specify a name for the job, the JD Edwards adapter connection that will be used for the job, and a valid runtime user who has the appropriate JD Edwards authority for the report being scheduled.
-
Specify the information to describe the job:
-
Job Name – Enter a name that describes the job.
-
Job Class – If you want to assign a defined job class to this job, choose it from the drop-down list. This field is optional.
-
Owner – Click the owner of the job. The owner can be an individual TA user or a workgroup (recommended).
-
Parent Group – If this job exists under a parent group, choose the name of the parent group from the drop-down list. All properties in the Agent Information section are inherited from its parent job group.
-
-
Specify the connection information in the Agent/Adapter Information section:
-
Agent/Adapter Name – Select the JD Edwards adapter connection to be used for this job from the drop-down list.
-
Agent List Name – Select a list for broadcasting the job to multiple servers or load balancing across servers.
-
Runtime User – Select a valid runtime user with the appropriate JD Edwards authority for the job from the drop-down list.
-
-
Specify the appropriate Tracking and Duration information for the job.
-
Click the JDE Job Definition tab.

To search for a UBE using the Find field located below the Browser tab, complete these steps:
-
Click the Find field and specify the UBE program name or use wildcards to browse through a list of matching UBE names.
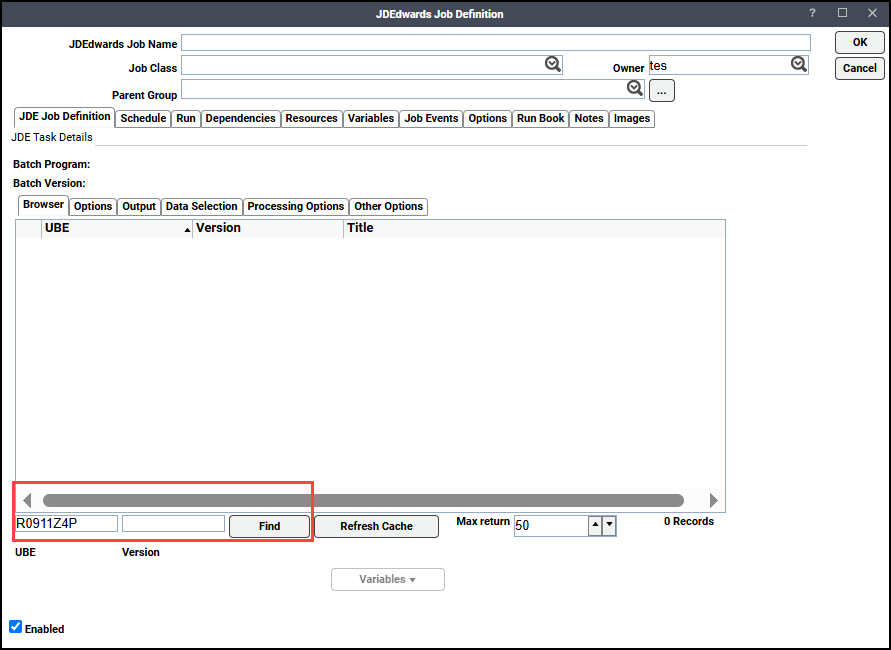
-
Click Find.
After locating the UBE and corresponding version you want to schedule, double-click the entry or right-click and use the Select menu option.
The JDE Task Details section is populated with the program and version selected. This is read only.
To improve performance, the adapter creates a cache of all UBEs and versions when it connects. If a UBE or version is added after this point, it may not display when Find is used. Use Refresh Cache to update the list for a specific UBE from the JDE database. This option only updates the matching UBE specified in the Find field.
Note: The button is disabled if a wildcard is specified.
The JDE Job Definition tab also contains these elements:
-
Refresh Cache – Updates the browser pane from the JDE database.
-
Max return – Specify the number of UBE search results returned. For performance consideration, it is limited. This is controlled by the Max Return field, which defaults to 50. If you search for a UBE name and more than the max number of results is found, a popup dialog displays asking you to redefine the search.
-
-
Click the Options subtab. This tab defines the queue, debug level, and tag that can be included in events.
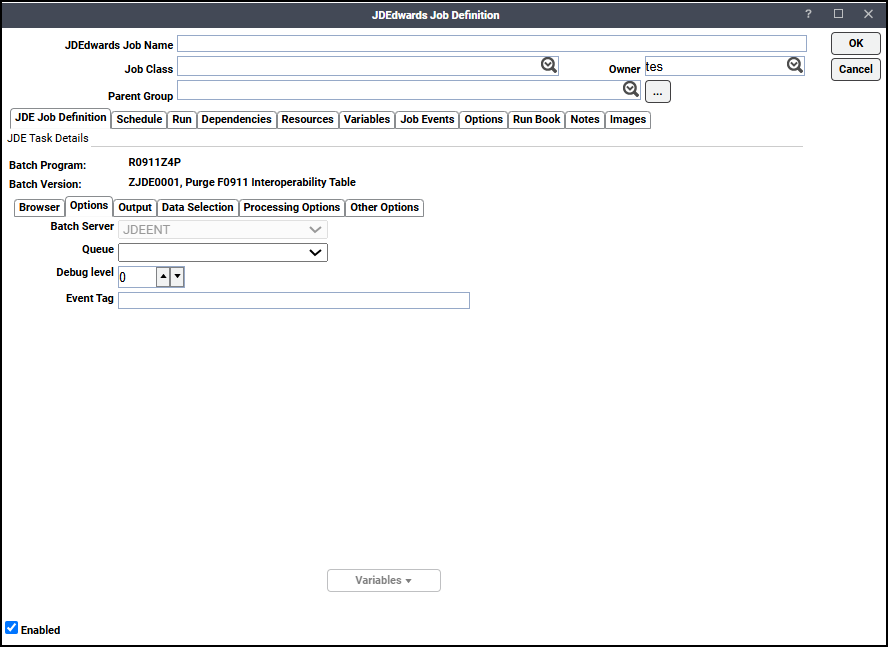
-
Complete the information on the dialog:
-
Batch Server – Displays the batch server the job to which the job is submitted. This value is read-only.
-
Queue – Choose a batch from the Queue drop-down menu. The default is to use the queue currently associated with the UBE.
-
Debug level – Click up or down arrow to set the UBE debug level. Valid values are 0 to 6.
-
Event Tag – Select to associate an identifier that you can refer to in a JD Edwards event.
Example: If your event sends an email about a new report, you can insert the event tag as a variable in the email's subject line or body text. You can use a variable in this field, such as a local group variable that identifies the customer or other data selection to which this run applies.
Place the cursor in the field and click Variables to enter a variable to be replaced at runtime.
-
Variables – Enter a variable in the Event Tag field to be replaced at runtime.
-
-
Click the Output subtab to specify formatting, saving, and printing options.
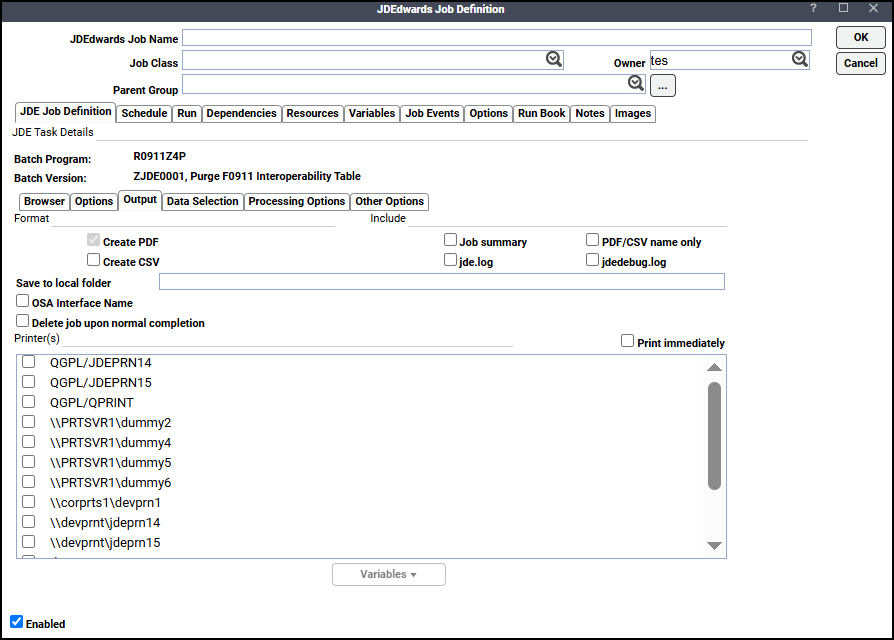
-
Select the Create CSV checkbox if you want to create a CSV output file in addition to the PDF file that JD Edwards always creates.
-
Go to the Include section. Select the checkboxes for the output that you want to include in the TA 's output displayed on the Output tab of the Job Details dialog from the console.
The Output tab of the Job Details dialog displays job summary data along with jde.log and jdedebug.log, if configured. An option to display only the PDF name is available so the output can be used as a variable in downstream jobs.
Note: To include log files, the connection must be set up with a UNC or FTP path so the adapter can access these files.
-
(Optional) Click the Save to local folder field and enter the full local path from the master’s perspective where you want the output to be saved.
Note: To use this option, first enable Use FTP, then select an FTP user from the drop-down list on the Connection Definition page, Options tab.
Example: C:\Users\user1\Shared\JDE\
-
(Optional) Select the Print immediately checkbox and check the checkbox next to each printer that you want to use.
-
(Optional) Select the Delete job upon normal completion checkbox. This option not only deletes the output on the server, but deletes the job record from JDE's F986110 table.
-
Click the Data Selection subtab to override data selection clauses.
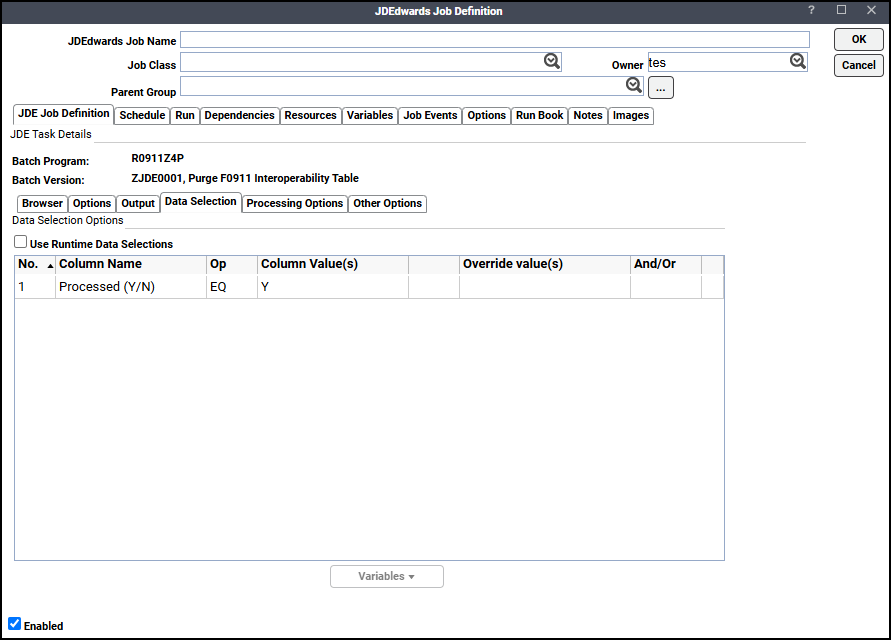
To edit the override value, double-click the selected row to display the Data Selection Override Values dialog.
To override the operator, click an operator (Operator list).
The operator values are as follows:
-
EQ – Equal
-
NE – Not equal
-
GT – Greater than
-
GE – Greater than or equal to
-
LT – Less than
-
LE – Less than or equal to
-
IN – In a set of values; requires more than one value separated with commas
-
NI – Not in a set of values; requires more than one value separated with commas
-
BW – Between a range of values; requires exactly two values, separated with a comma
-
NB – Not between a range of values; requires exactly two values, separated with a comma
-
-
Enter a override value in the Override Value(s) field. Optionally, click Variables to insert a variable to be replaced with a value at runtime.
An empty value in the Override(s) field indicates that no override value will be used at time of submission.
Note: To explicitly override a value with an empty string, enter the special variable, <Blank>, into the field.
-
Click the Processing Options subtab to override processing options.
To edit the override value, double-click the selected row to display the Data Processing Override Values dialog. In the Override Value field, enter an override value. Optionally, click Variables to insert a variable to be replaced with a value at runtime. An empty value in the Override(s) field indicates that no override value will be used at time of submission. To explicitly override a value with an empty string, the special variable, <Blank>, must be entered into the field.
-
Click the Debug subtab to aid in troubleshooting the UBE version's associated data in XML format.
Note: The Debug tab only shows if DEBUG=ON is specified on the Options tab of the Connection Definition dialog.
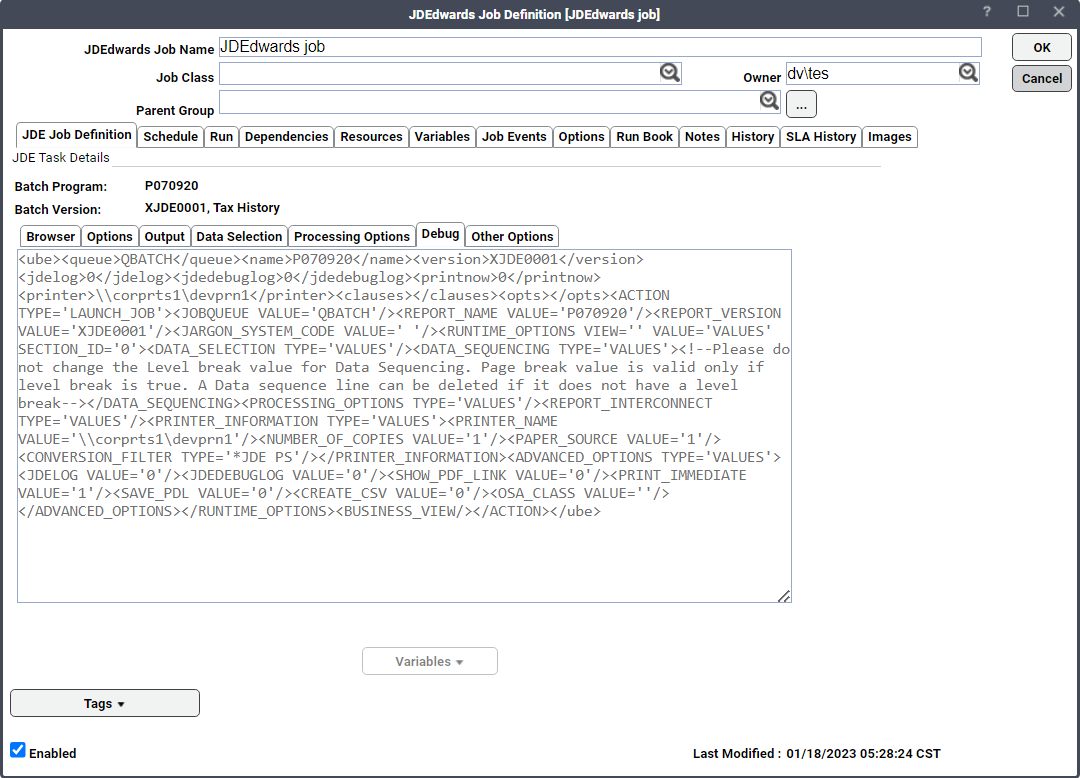
The Debug tab displays the XML definition associated with the selected UBE and version.