Defining Azure Jobs
Note: All links marked with  are external and are not controlled by Redwood. Use caution when accessing external links and follow your organization's security protocols.
This section provides instructions for defining an Azure job in TA and descriptions of the various operation types that can be defined.
To define an Azure job:
-
Click Definitions > Jobs on the Navigation pane to display the Jobs pane.
-
Right-click Jobs and choose Add Job > Azure Job from the context menu. The Azure Job Definition dialog appears.
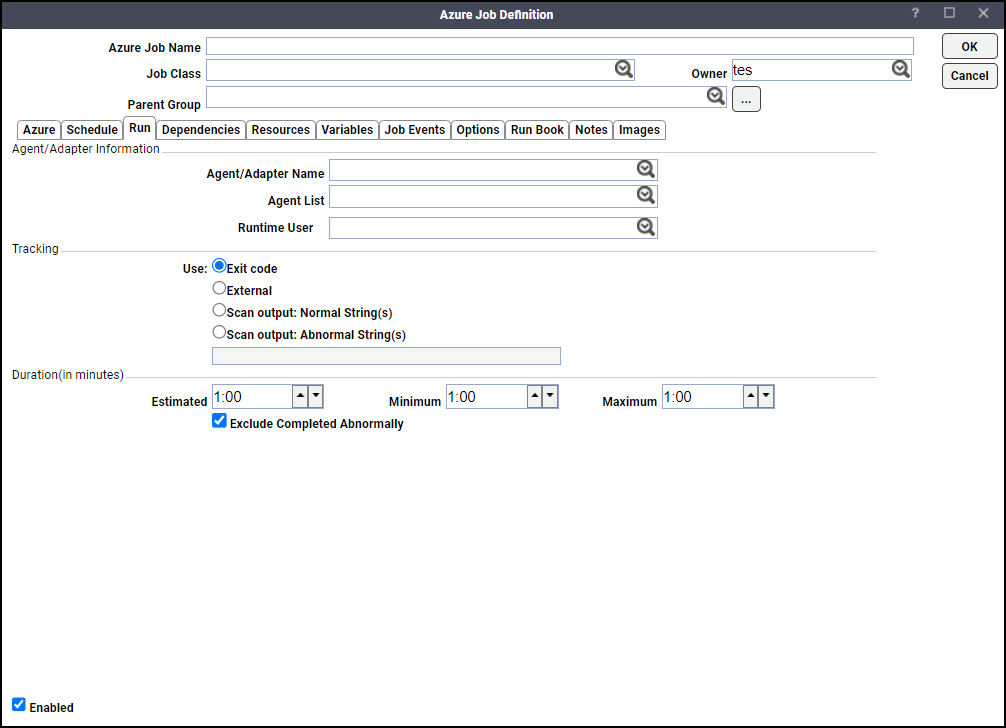
By default, the Run tab is the first tab displayed. You'll specify a job name and Azure connection for the job.
-
Specify this information to describe the job:
-
Azure Job Name – Enter a name that describes the job.
-
Job Class – (Optional) To assign a defined job class, choose a job class from the dropdown list.
-
Owner – From the dropdown list, choose the user or work group that owns the job.
-
Parent Group – If this job exists within a parent group, click the parent group name from the dropdown list.
-
-
Specify the connection information:
-
Agent/Adapter Name – Click the Azure Adapter connection to be used for this job from the dropdown list
OR
-
Agent List – Choose the Agent List from the dropdown list.
Note: The runtime user is not applicable for an Azure job.
-
-
Click the Azure tab.

You can use the Azure job to define a set of operations to be performed. For each operation, you can define an action to be taken when the operation completes with either a success or a failure status. The completion status of the operation (success or failure) determines the order that the set of defined operations runs.
The Azure tab displays a grid that contains these fields:
-
Operation # – The operation number.
-
Operation – The operation type defined for a Virtual Machine.
-
Resource Group – The name of the Azure Resource Group associated with a Virtual Machine.
-
Name – The name of the Virtual Machine.
-
On Success – The action to occur if the operation is successful.
-
On Failure – The action to occur if the operation fails.
-
Max Allowed Runs – The number of times an operation is allowed to run. The default value for this field is 1.
The Azure tab contains these buttons:
-
Add Operation – Adds an operation to the set of operations that the job performs. Click this button to display the Operation Definition dialog. If an operation is mapped to another operation, its position cannot be moved up or down in the list of operations.
Edit – Selecting an operation in the grid enables Edit. Use this function to alter an existing operation.
Delete – Click this button to remove a selected operation in the grid. If an operation is mapped to another operation, it cannot be deleted. However, when an operation is deleted, the adapter automatically rearranges operation count and mapped operation ID.
Clear – Removes all data from the grid.
Up Arrow – Moves an operation in the grid towards the top of the list.
Down Arrow – Moves an operation in the grid towards the bottom of the list.
Start from Operation# – Click an operation number to start the job execution.
-
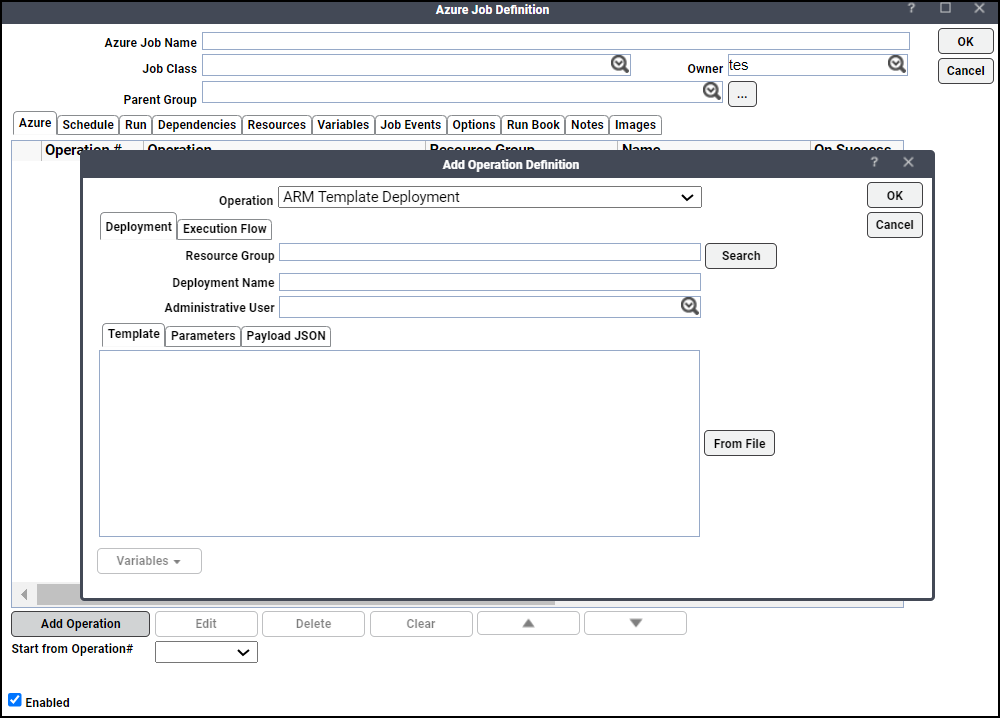
Click Add Operation to display the Add Operation Definition dialog.
Here is the list of available operation types:
-
ARM Template Deployment
-
Capture Virtual Machine
-
Create Virtual Machine
-
Deallocate Virtual Machine
-
Delete Virtual Machine
-
Restart Virtual Machine
-
Start Virtual Machine
-
Stop Virtual Machine
-
Update the Virtual Machine Disk
-
Update Virtual Machine Resource JSON
-
Update Virtual Machine Size
-
Update Virtual Machine Tags
-
Note: The sections below explain each operation type.
ARM Template Deployment
This operation creates a Virtual Machine using a template.
Note: To perform the ARM Template Deployment operation in Tidal Automation, you must download the resource template from the Microsoft Azure portal.
-
Click the Deployment tab to display these fields:
-
Resource Group – Displays the name of the Azure Resource Group associated with a Virtual Machine or click Search to locate an Azure Resource Group name.
-
Deployment Name – Enter a deployment name which is unique within the Resource Group.
-
Administrative User – From the Administrative User field, choose the name of the user. Click a VM admin user and password stored as an Azure runtime user in TA.
Note: The Administrative User field populates the template with adminusername and adminpassword values.
-
-
Click Template on the Deployment tab.
-
Click From File to choose and upload Template.json, which is downloaded from the Azure portal.
Note: Once the template is uploaded, use the Parameters tab or Override option in the Payload JSON tab to provide values.
-
Click Parameters on the Deployment tab. The Parameters tab displays these fields in the grid:
-
Name – Displays the name of the parameters.
-
Value – Displays the corresponding parameter values.
Note: The Parameter tab displays the default parameters defined in the template. You can override the default parameters by adding (Add), editing (Edit), or deleting (Delete) parameters.
The Parameters tab contains these buttons:
-
Add – Add a parameter by entering the Name and Value in the Parameter [Add] dialog and clicking OK. The parameter added appears in the grid.
Note: (Optional) Using the Add function, you can re-enter a parameter if the parameter was inadvertently deleted.
-
Edit – Choose a parameter from the grid and click Edit to change the parameter.
Note: Parameter values are displayed as a list box. The parameter name is read-only in Edit mode.
-
Delete – Choose a parameter and click Delete to remove it. When the parameter is removed, the default value, if specified in the defaultValue attribute in the parameters section of the template, is used by Azure to process the template. To learn more, see Parameters in ARM templates .
Note: The Parameters tab is not displayed if the uploaded template contains the parametersLink property. To learn more about the parametersLink property, see Using linked and nested templates when deploying Azure resources
.Also, if the template contains parametersLink property, the Administrative User field is not mandatory and the field can be blank.
-
-
Click the Payload JSON tab on the Deployment tab to display the payload for Deployment.
Note: Check the Override checkbox to manually edit the Payload JSON. If you check the Override checkbox, the Parameters tab is hidden.
-
Click the Execution Flow tab to define next instructions for the operation based on its completion status: successful or with failures.
Capture Virtual Machine
This operation copies the Virtual Hard Disk (VHD) of a Virtual Machine.

Note: This operation is performed in the VM containing an unmanaged disk. While creating the VM in the Azure portal, uncheck the Use managed disk checkbox in the Disks tab. Also, ensure that the VM is in stopped/deallocated state to perform this action.
-
Click the Virtual Machine tab.
This tab contains these fields:
-
Resource Group – Enter an Azure Resource Group name or click Search to locate an Azure Resource Group name.
-
Virtual Machine – Enter a Virtual Machine name or click Search to locate a Virtual Machine.
Note: You can narrow your search using the * wildcard along with prefix and/or suffix. The VM search populates only the unmanaged disk VMs available in the resource group.
-
Virtual Hard Disk Name Prefix – Enter the Virtual Hard Disk name prefix for the VM image to be captured.
Note: The VHD file is placed in the storage account of the corresponding VM in the folder structure: system/Microsoft.Compute/Images/destinationContainerName. For example, if an unmanaged disk VM is created inside a resource group, a storage account is also created, and the VHD file is saved in the referenced path for the storage account.
-
Destination Container Name – Enter the Destination Container Name where the VHD file is stored in the container created.
-
-
Click the Execution Flow tab to define next instructions for the operation based on its completion status: successful or with failures.
Note: The VM is generalized after this operation is performed; as a result, the VM should not be restarted.
Create Virtual Machine
This operation creates a Virtual Machine from managed images in the Azure portal.
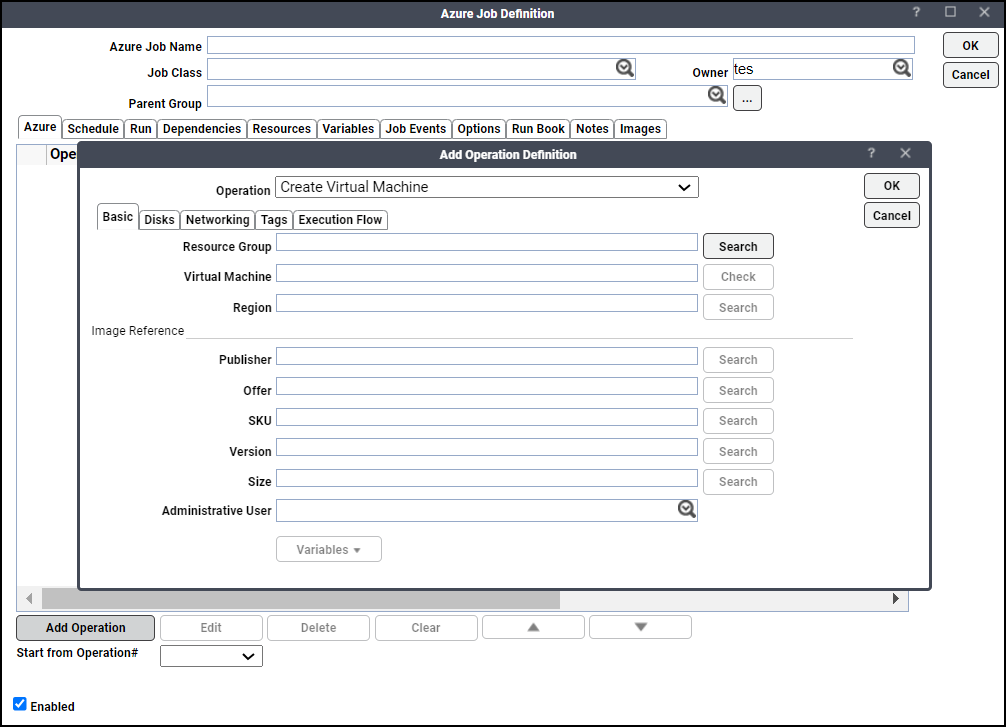
Note: A Network Interface Card (NIC) must be created before creating a Virtual Machine.
-
Click the Basic tab.
The Basic tab contains these fields:
-
Resource Group – Enter an Azure Resource Group name or click Search to locate an Azure Resource Group name.
-
Virtual Machine – Enter a Virtual Machine name or click Check to identify a Virtual Machine.
-
Region – This field is populated in advance based on the Resource Group selection. Click Search to search and replace a specific region.
-
Publisher – Enter the Virtual Machine image publisher or click Search to choose the Publisher.
-
Offer – Enter the Offer created by the publisher or click Search to locate the Offer.
-
SKU – Enter the image SKU (Stock-Keeping Unit) or click Search to locate the SKU.
-
Version – Enter the version of the image used to create the Virtual Machine.
-
Size – Enter the size of the virtual machine or click Search to locate the available sizes in the selected region.
-
User – Choose the user from the User dropdown field.
-
-
Click the Disks tab, and then click the OS Type (Premium SSD, Standard SSD, Standard HDD) to create a new disk or attach data disks already available in the region.
The Disks tab contains these buttons:
-
Add – Add creates a new disk using the Create New Disk option or attaches an existing disk using the Attach Existing Disk option when a user enters the appropriate fields in the Add Data Disk dialog. The Data Disks grid display the disks added.
-
Detach – Detach removes a disk when a disk is selected from the Data Disks grid.
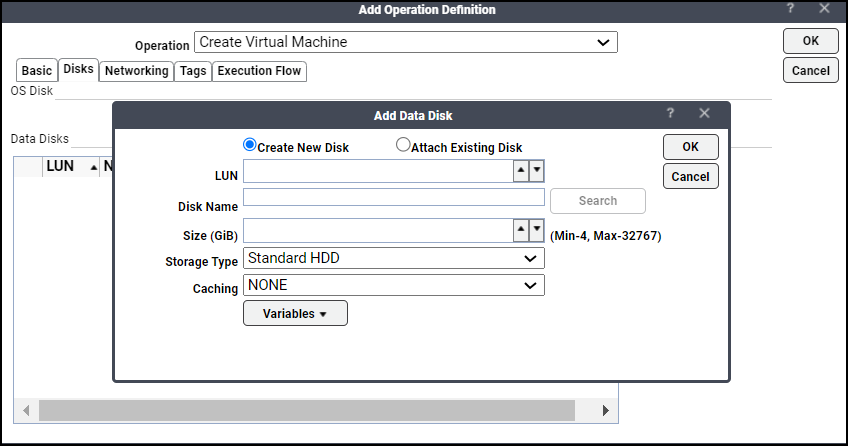
Add Data Disk
The Add Data Disk dialog contains these fields you can use to add a new disk or attach an existing disk:
-
LUN – Specify the unique Logical Unit Number (LUN).
-
Disk Name – Enter the name of the disk.
-
Size (GiB) – Specify the size of the data disk.
Note: Search is enabled only for the Attach Existing Disk option. To attach an existing disk, click Search to locate the existing disk name.
-
Storage Type – Choose the Storage Type (Premium SSD, Standard SSD, Standard HDD) from the Storage Type dropdown list.
Note: This field is disabled for the Attach Existing Disk option.
Caching – Choose Caching (None, Read-Only, Read-Write) from the Caching dropdown list.
-
-
Click the Networking tab. The Networking tab contains the Network Interface field.
Enter the Network Interface or click Search to locate and add a Network Interface.
Note: A user can choose a Network Interface based on the Resource Group and Region entered in the Basic tab.
-
Click the Tags tab to add tags to the Virtual Machine.
The Tags tab contains these buttons:
Add – Click Add to add name-value tags to the Virtual Machine. The tags added are displayed in the grid.
Edit – Click Edit to change a tag. This button is enabled when a tag in the grid is selected.
The tag name is read-only and is not editable.
Delete – Click Delete to remove a tag. This button is enabled when a tag in the grid is selected.
Clear – Click Clear to remove all data from the grid.
-
Click the Execution Flow tab to define next instructions for the operation based on its completion status: successful or with failures.
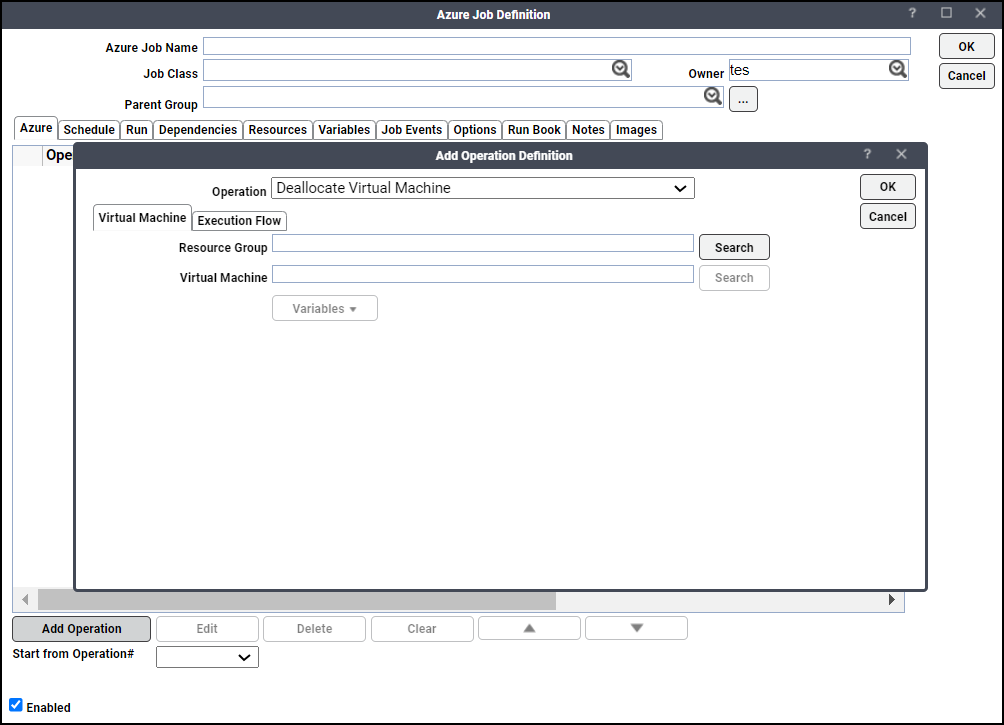
Deallocate Virtual Machine
This operation shuts down a Virtual Machine and releases the compute resources.
-
Click the Virtual Machine tab.
This tab contains these fields:
-
Resource Group – Enter an Azure Resource Group name or click Search to locate an Azure Resource Group name.
-
Virtual Machine – Enter a Virtual Machine name or click Search to locate a Virtual Machine.
You can narrow your search using the * wildcard along with prefix and/or suffix.
-
-
Click the Execution Flow tab to define next instructions for the operation based on its completion status: successful or with failures.
-
Click OK to add the operation to the job grid.
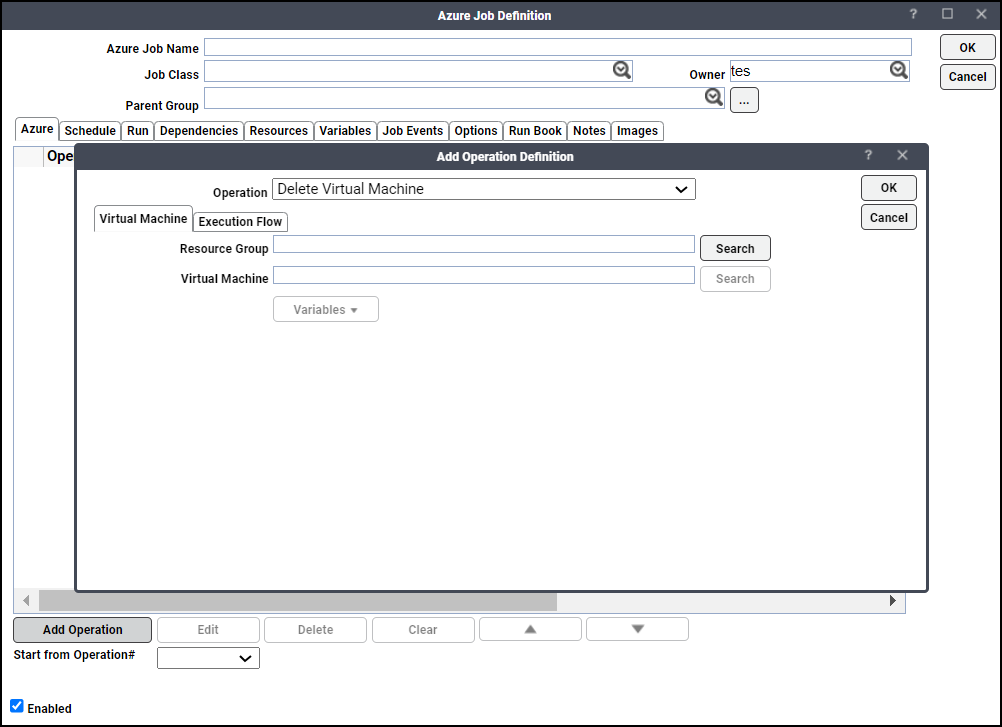
Delete Virtual Machine
This operation deletes a Virtual Machine.
-
Click the Virtual Machine tab.
This tab contains these fields:
-
Resource Group – Enter an Azure Resource Group name or click Search to locate an Azure Resource Group name.
-
Virtual Machine – Enter a Virtual Machine name or click Search to locate a Virtual Machine.
You can narrow your search using the * wildcard along with prefix and/or suffix.
-
-
Click the Execution Flow tab to define next instructions for the operation based on its completion status: successful or with failures.
-
Click OK to add the operation to the job grid.
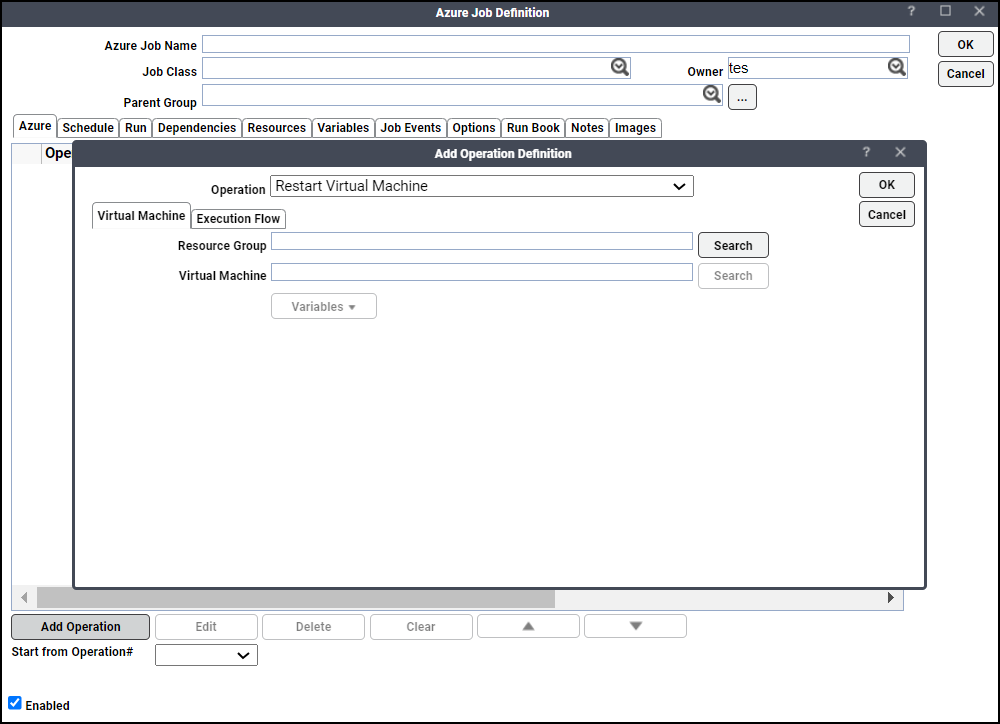
Restart Virtual Machine
This operation restarts a Virtual Machine.
-
Click the Virtual Machine tab.
This tab contains these fields:
-
Resource Group – Enter an Azure Resource Group name or click Search to locate an Azure Resource Group name.
-
Virtual Machine – Enter a Virtual Machine name or click Search to locate a Virtual Machine.
You can narrow your search using the * wildcard along with prefix and/or suffix.
-
-
Click the Execution Flow tab to define next instructions for the operation based on its completion status: successful or with failures.
-
Click OK to add the operation to the job grid.
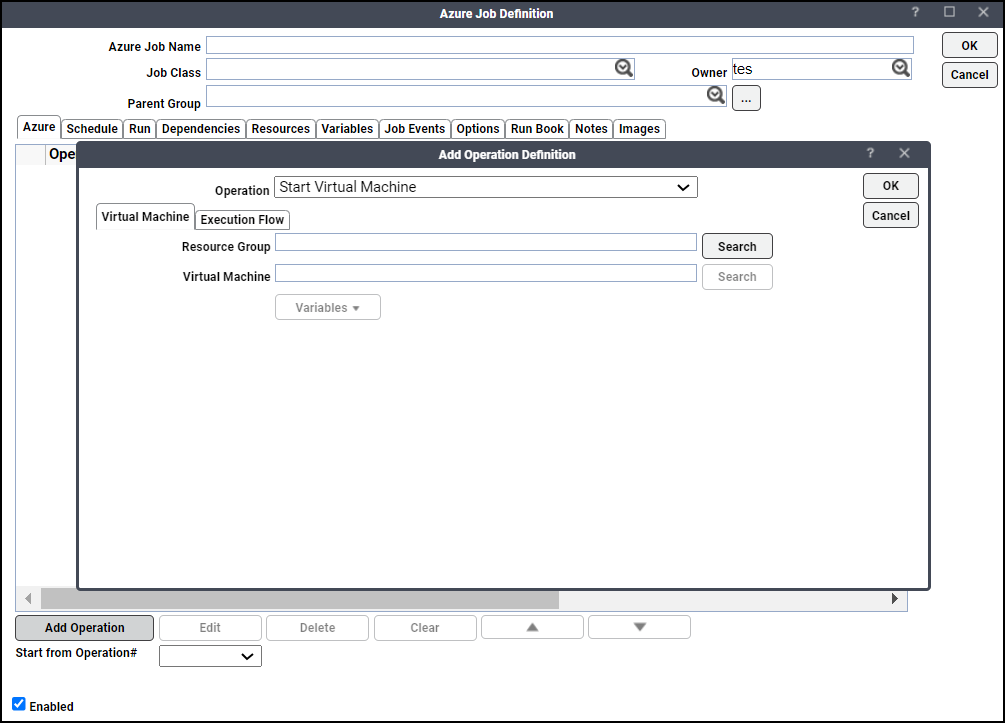
Start Virtual Machine
-
Click the Virtual Machine tab.
This tab contains these fields:
-
Resource Group – Enter an Azure Resource Group name or click Search to locate an Azure Resource Group name.
-
Virtual Machine – Enter a Virtual Machine name or click Search to locate a Virtual Machine.
You can narrow your search using the * wildcard along with prefix and/or suffix.
-
-
Click the Execution Flow tab to define next instructions for the operation based on its completion status: successful or with failures. .
-
3. Click OK to add the operation to the job grid.
Stop Virtual Machine
This operation powers off (stops) a Virtual Machine.
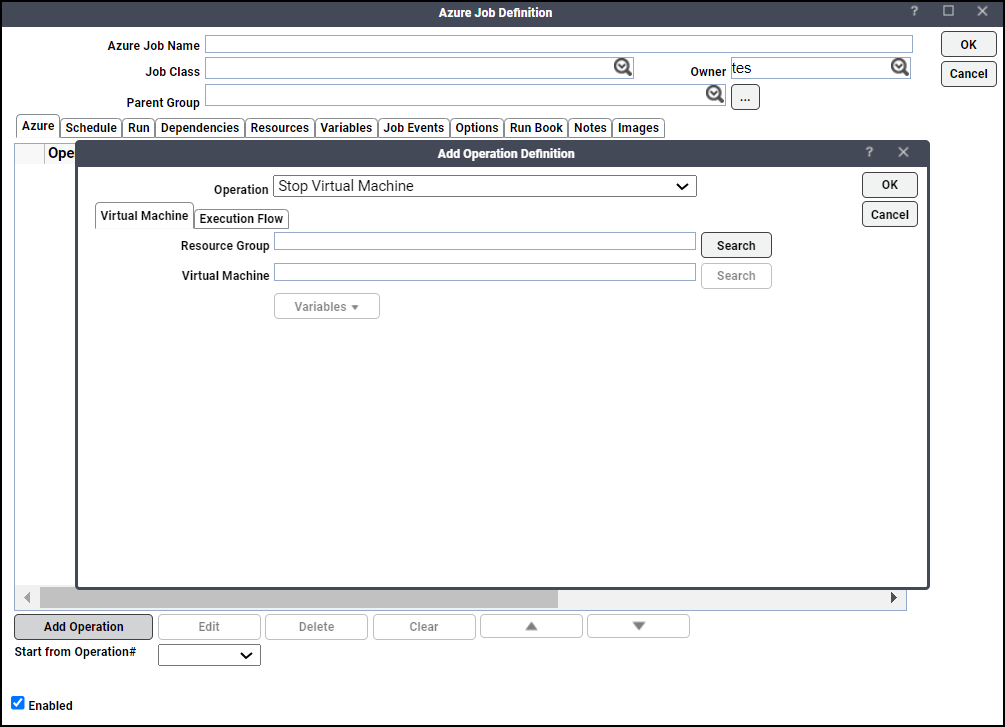
-
Click the Virtual Machine tab.
This tab contains these fields:
-
Resource Group – Enter an Azure Resource Group name or click Search to locate an Azure Resource Group name.
-
Virtual Machine – Enter a Virtual Machine name or click Search to locate a Virtual Machine.
You can narrow your search using the * wildcard along with prefix and/or suffix.
-
-
Click the Execution Flow tab to define next instructions for the operation based on its completion status: successful or with failures.
-
Click OK to add the operation to the job grid.
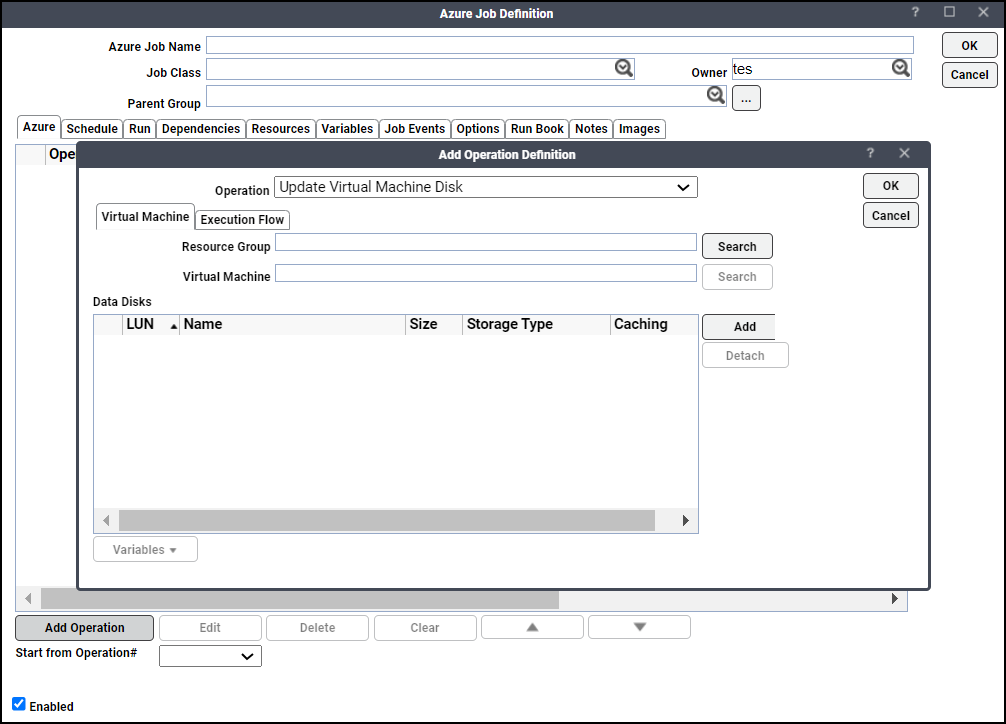
Update the Virtual Machine Disk
This operation adds a new disk or attaches or detaches the existing data disk in the Virtual Machine.
-
Click the Virtual Machine tab.
The Virtual Machine tab contains these fields:
-
Resource Group – Enter an Azure Resource Group name or click Search to locate an Azure Resource Group name.
-
Virtual Machine – Enter a Virtual Machine name or click Search to locate a Virtual Machine. The Virtual Machine tab contains Add.
Add – Click Add to add or attach a disk to a Virtual Machine. Choose Create New Disk or Attach Existing Disk in the Add Data Disk dialog. The disks added appear as records in the grid of the Data Disks field.
Detach – To detach a disk from the Virtual Machine, click a disk from the grid and click Detach.
-
-
Click the Execution Flow tab to define next instructions for the operation based on its completion status: successful or with failures.
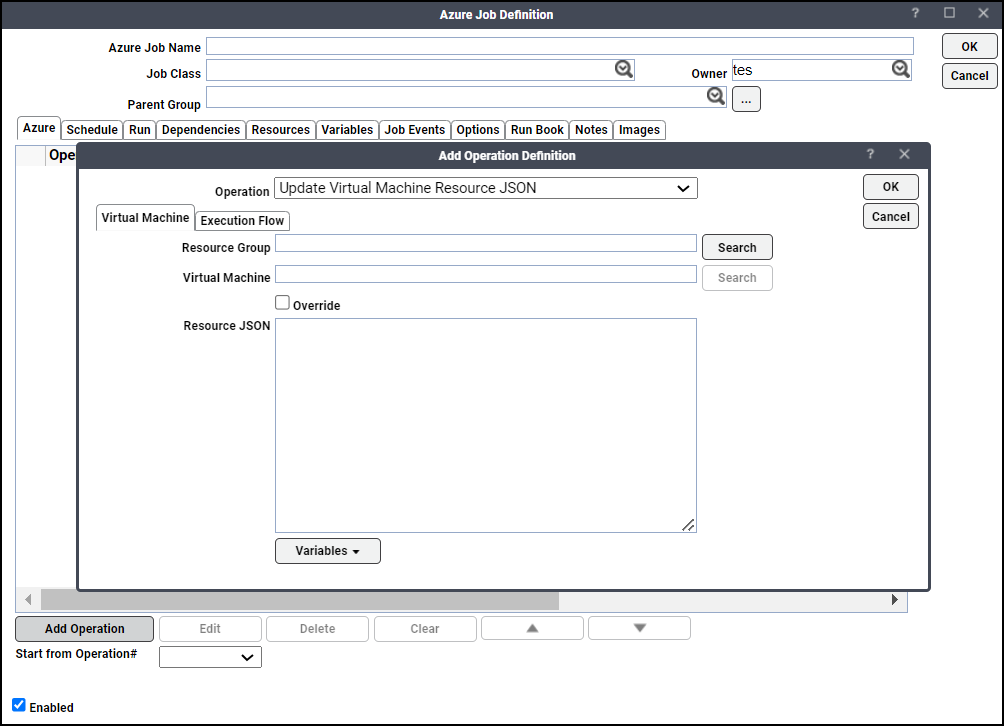
Update Virtual Machine Resource JSON
-
Click the Virtual Machine tab.
The tab contains these fields:
-
Resource Group – Enter an Azure Resource Group name or click Search to locate an Azure Resource Group name.
-
Virtual Machine – Enter a Virtual Machine name or click Search to locate a Virtual Machine.
-
Resource JSON – Displays the Resource JSON associated with the Virtual Machine.
Note: To edit the Resource JSON, check the Override checkbox.
-
-
Click the Execution Flow tab to define next instructions for the operation based on its completion status: successful or with failures.
Update Virtual Machine Size

-
Click the Virtual Machine tab.
The tab contains these fields:
-
Resource Group – Enter an Azure Resource Group name or click Search to locate an Azure Resource Group name.
-
Virtual Machine – Enter a Virtual Machine name or click Search to locate a Virtual Machine.
-
Size – Enter the size of the Virtual Machine or click Search to locate the appropriate size.
-
-
Click the Execution Flow tab to define next instructions for the operation based on its completion status: successful or with failures.
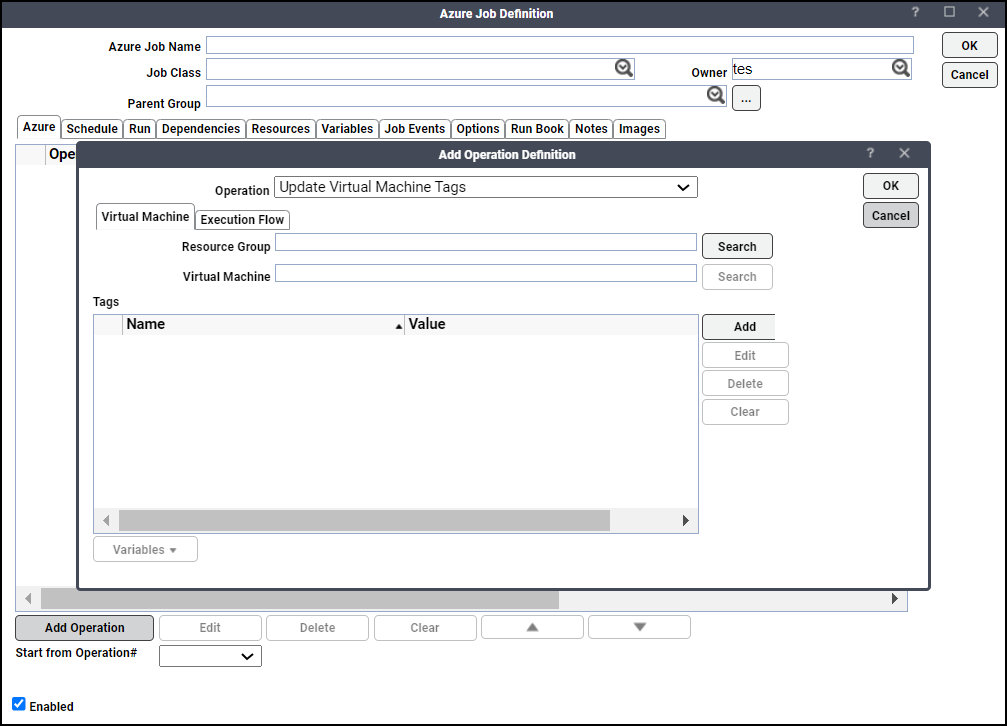
Update Virtual Machine Tags
-
Click the Virtual Machine tab.
The Virtual Machine tab contains these fields:
-
Resource Group – Enter an Azure Resource Group name or click Search to locate an Azure Resource Group name.
-
Virtual Machine – Enter a Virtual Machine name or click Search to locate a Virtual Machine.
-
-
Click Add and enter the tag's Name and Value in the Add Tags dialog. The tags you add are shown in the grid.
To edit, delete, or clear tags, choose the tags from the grid. Click Edit, Delete or Clear.
Note: While editing, the tag name is read-only and cannot be edited.
-
Click the Execution Flow tab to define next instructions for the operation based on its completion status: successful or with failures.
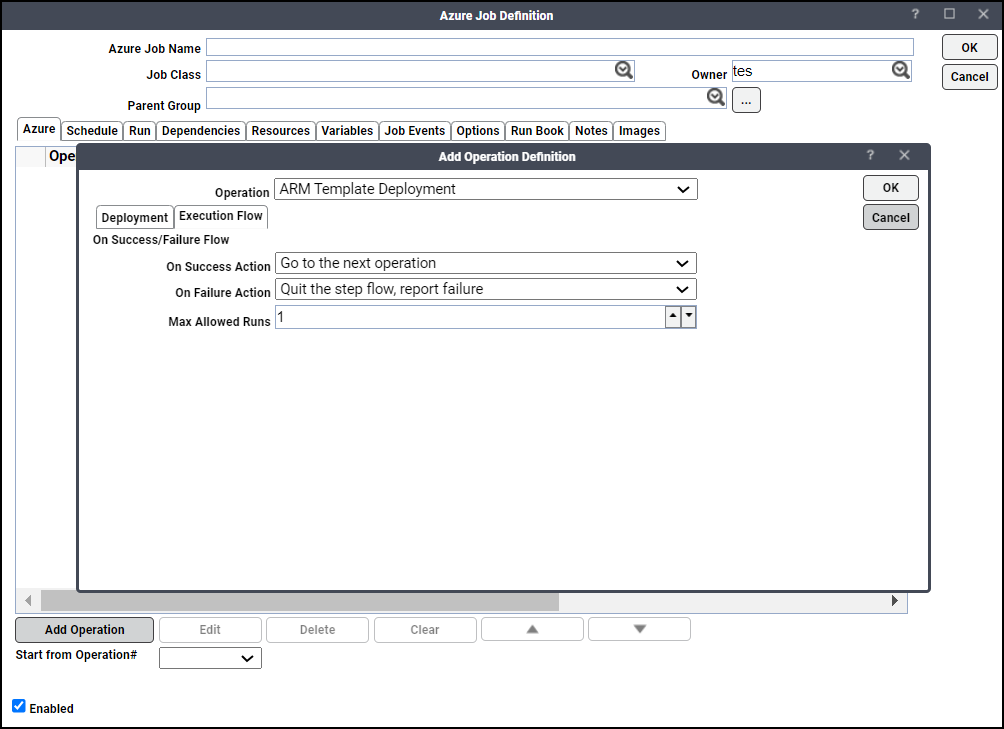
Execution Flow
The Execution Flow tab is used to:
-
Define subsequent actions following either successful or failed completion of a step.
-
Define the maximum number of times a step is allowed to run. Note that you can use this feature to break the execution sequence of a set of steps defined in the Azure job.
The Execution Flow tab has these fields:
-
On Success Action: When an operation is successfully completed, choose from these operations:
Go to the next operation.
Quit the operation flow, report success.
Quit the operation flow, report failure.
Go to operation #N.
-
On Failure Action: When the operation fails, choose from these operations:
Go to the next operation.
Quit the operation flow, report success.
Quit the operation flow, report failure.
Go to operation #N.
Note: ‘N’ is an operation number assigned to an already-defined operation. If Go to Next operation is selected from either On Success Action or On Failure Action fields, the job completes normally even if there is no next operation.
-
Max. Allowed Runs: Enter a number in this field that represents the maximum number of times an operation can run. When this number is reached, the operation is not run and the Azure jobs fail with the status of Completed Abnormally.
This table explains the behavior of each type of action:
|
Action |
Description |
|---|---|
|
Go to the next operation |
This action ensures that, the next operation in the set of defined operations is executed. If no next operation is defined, then the sequence of execution of operations is terminated and the Azure job completes with the status COMPLETED NORMALLY or COMPLETED ABNORMALLY based on the completion status of the last operation. |
|
Quit the operation flow, report success |
This action ensures that, after the operation is executed, no other operation is executed, and simultaneously, the Azure job completes with the status COMPLETED NORMALLY. |
|
Quit the operation flow, report failure |
This action ensures that, after the operation is executed, no other operation is executed, and simultaneously, the Azure job completes with the status COMPLETED ABNORMALLY. |
|
Go to operation #N |
This action ensures that following an executed operation, the next specified operation identified by operation number, N, is executed. |