Working with PeopleSoft Processes
A PeopleSoft job consists of one or more processes executed in sequence. A process is any of the available process types such as SQR Reports, COBOL programs, Crystal Reports, Application Engines and so forth. The only exception is the PSJob type which is handled differently. You can change the sequence of the processes, edit a process or add and delete various processes according to your needs. Best results are obtained by maintaining one process per job; use job dependencies and queues to control sequence and concurrency.
You can add, edit, delete and move PeopleSoft process requests using buttons on the PeopleSoft tab of the PeopleSoft Job Definition dialog.
-
To add a process, click Add to display the PeopleSoft Job Step Details dialog. From this dialog, you can add a new process for the job by entering the appropriate information.
-
To edit the details for a process request, choose a job step and click Edit to display the PeopleSoft Job Step Details dialog showing the characteristics of the selected job step.
-
To delete a process step from a job, choose it and click Delete.
-
To change the sequence in which processes are executed, click the job step that you want to move and click Up or Down.
Defining a Process Request
From the Step Details dialog in TA you can choose an existing process within PeopleSoft. This dialog provides four tabs of options to accommodate the variety of processes, output options and their associated run controls that are available to PeopleSoft users. The options on the Process tab of this dialog manage the basic information about the process that is being scheduled to run from TA.
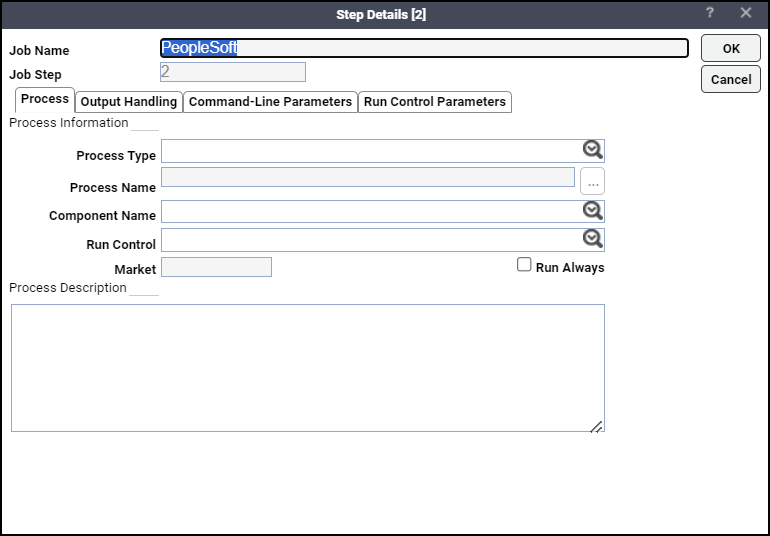
The Job Name field displays the name given to the TA job definition.
The Job Step number represents the sequence order for the process in the job.
Example: If this is the first job step listed on the PeopleSoft tab of the PeopleSoft Job Definition dialog, the number is 1.
Note: It is recommended that TA jobs be limited to just one process. The job grouping, dependency and queuing features of TA can then be used to manage multiple jobs and their associated processes.
To define a process request:
-
Click in the Process Type field the type of process being scheduled. If a type of process for your PeopleSoft instance is not listed, your process server may not be configured to work with that particular process type. However, the PSJob process type is unavailable in the Process Type list.
Note: To add a PSJob process, import the PSJob process as a multi-step job by selecting it in the Copy From PeopleSoft Job field at the bottom of the PeopleSoft tab of the job definition. Unlike other process types that have a single step, a PSJob is viewed as a multi-step TA job.
-
Click an existing authorized PeopleSoft process based on the process type selected previously in the Process Name field.
Note: To include an existing process, choose it from the list. You must type at least the first letters of the process name to quickly scroll through the list to pinpoint the desired process.
You can also click ellipses (...) in the Process Name field to display the Select Process Name dialog.
The Component Name field is used for those processes that are associated with multiple PeopleSoft components.
-
Navigate to the Run Control field.
-
Choose a run control ID from the list of existing run control IDs available to the PeopleSoft operator ID associated with this process (the runtime user).
The Market field is populated automatically based on the chosen Component Name.
-
Check the Run Always checkbox to force this process to run even if the previous process in this job failed. If this process depends on the results of the previous process in the same job, do not check this checkbox.
The use of this option only applies to jobs with multiple steps, which is not recommended. Instead use multiple single process jobs in job groups with dependencies and queues to manage concurrency.
-
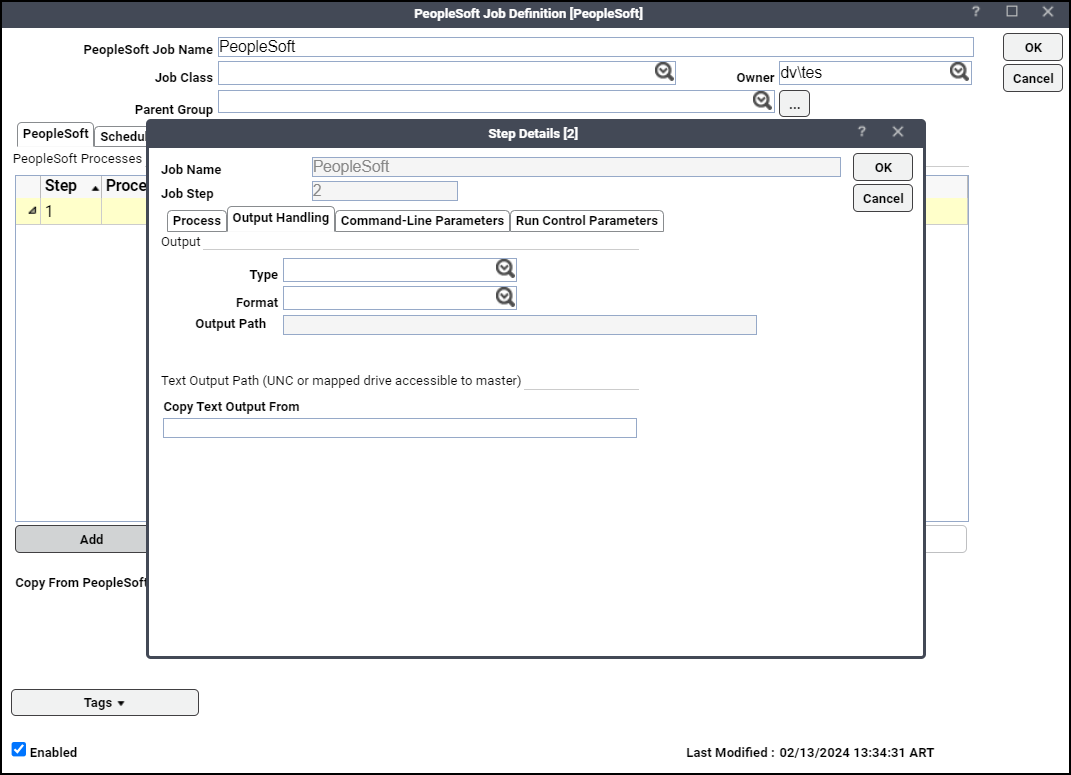
Click the Output Handling tab to configure how to manage the PeopleSoft output from the process.
-
Choose what kind of output you desire in the Type field.
The options that are available may vary depending upon the selection in the Process Type field. There are five options:
-
File – Writes the process output to a file that is specified in the Output Path field.
-
Printer – Sends the job output to a printer specified in the Printer field or if not specified, to the printer defined for the process profile permissions of the person running the process. If the printer is not defined, then the default is the printer for the Process Scheduler.
-
Email – Sends the process output in an email, usually to the person running the process, but optionally to an email list and distribution list. This option is commonly used with SQR, PS/n Vision and Crystal reports.
Distribution List: You can have the Peoplesoft server to send the process output to the existing users or roles using the distribution list feature. The distribution pane is displayed in the Output Handling tab.
-
Web – Posts process output to the report repository in a format specified by the format list, typically HTML or PDF.
Note: Whenever posting job output to the web, the output location for the report and logs should be a shared directory or an FTP location. There may be a delay as the output is transferred and posted to the web server. The Output tab of the Job Detail dialog will display “Output Pending” until the output arrives. This delay (by default, 30 seconds) can be adjusted with the PSWaitOutput configuration parameter specified on the Options tab of the connection definition.
If a process does not generate a report, logs can still be posted to the web by selecting Web as the Type and Text as the Format option in the Job Step Details dialog.
-
-
Click the format of the output in the Format field.
The options that are available vary depending upon the selection in the Process Type list.
Note: Only text formats will be available from the Output tab of the Job Details dialog in the TA console;e.g., TXT or HTML.
-
Enter in the Output Path field a destination where the PeopleSoft process will write its output:
-
If you selected the Printer option in the Type list, designate a printer.
-
If you selected the File option in the Type list, enter a file path.
-
If you selected the Email option in the Type list, enter an email address.
QueryName and Transformation fields are displayed, if you selected PSQUERY as the process name in the Process tab and XFORM from the Form list in the Output Handling tab.
-
QueryName – QueryName is fetched and displayed based on the run control ID. You can change the query name from the list, if required.
-
Transformation – Transformation field is displayed based on the query name. Choose the transformation from the list.
-
-
Click Email. The distribution pane is displayed in the Output Handling tab.
-
Click Add and click USER if you want to send the process output to particular user(s). A pop-up window is displayed.
-
Enter first few letters of the user and the distribution list will display the matching user IDs.
Note: You can enter % in the Distribute To field to fetch all the records. The maximum records that are displayed has been set to 200.
-
Choose the required users and click OK to send the process output data.
-
Click Add and click ROLE if you want to send the process output to a particular role. A pop-up window appears.
-
Enter in the Distribute To field the first few letters of the role and the distribution list will display the matching role IDs.
-
Click the required role IDs and click OK to send the process output data.
Note: You can use Delete to delete any user IDs or the role IDs that is not required.
-
Enter the output directory in the Copy Text Output From field where TA can retrieve the output. This is most likely to be either a UNC name or a mapped drive, unless you configured the connection to use FTP. TA will retrieve the job output from this designated location; a default is specified in the connection definition.
Note: The TA Master must be able to access the output directory specified in the Text Output Path section. Specify the output location relative to your TA Master or FTP host login.
-
Click the Command-Line Parameters tab.
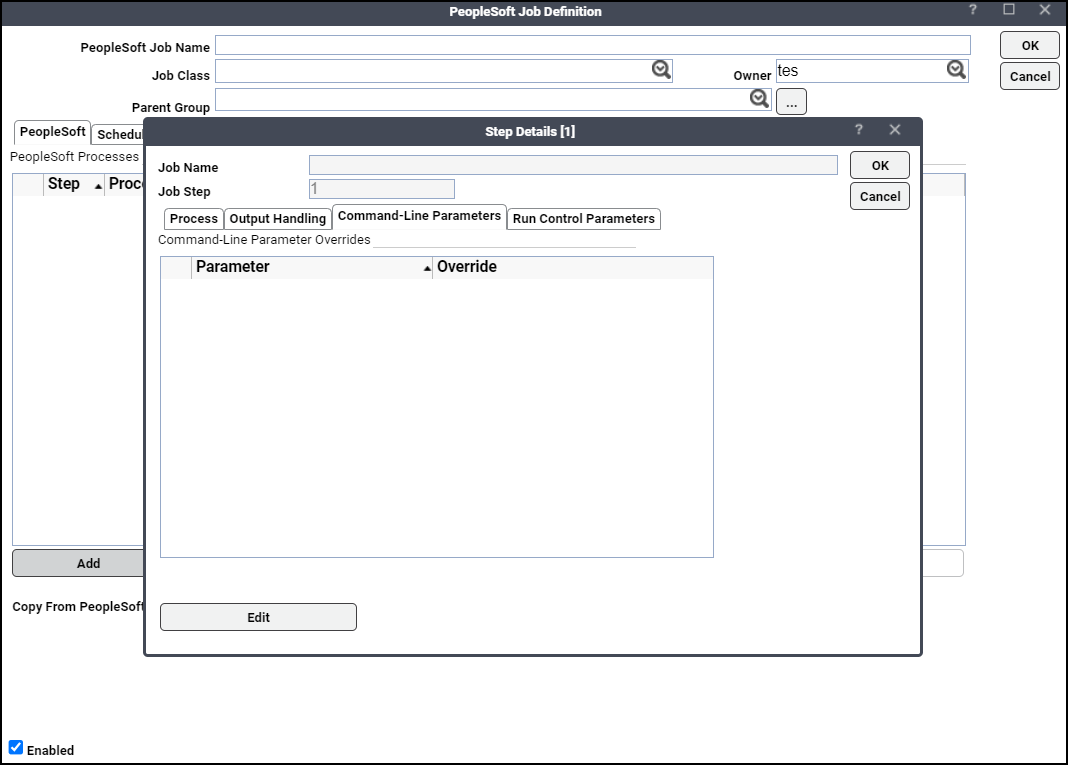
Command line parameters are displayed on this tab for any overrides that might be necessary. The command line parameters that are available for a process are listed in the Parameters column.
You can override the default parameter value by double-clicking a parameter and specifying parameter runtime overrides via the Edit CommandLine Parameters dialog.
Variables available at the bottom of the tab provides access to predefined variables in TA. These command line parameter values can be replaced from this tab as needed.
The Command-Line Parameters tab above illustrates TA ’s flexibility when using variables in command line parameters and shows a job definition in TA to run the PeopleSoft SQR process FIN2025, Format EFT Files. The process creates the EFT files to send to banks. The process can be triggered from four different locations in PeopleSoft:
-
Accounts Receivables Direct Debits Remit to Bank,
-
Accounts Receivables Drafts Remit to Bank,
-
Accounts Receivables IPAC Processing,
-
Payables Pay Cycle Manager.
The four bind variable parameters preceded by :EFT_WRK are required to run the Format EFT Files process. These are usually populated in the working memory of the tools application based on the context from which the process was initiated. If the process is run from the Pay Cycle Manager, PeopleTools automatically resolves the bind variables to:
-
:EFT_WRK.PARM1 to "C",
-
:EFT_WRK.PARM2 to the Pay Cycle Id,
-
:EFT_WRK.PARM3 to the Pay Cycle Sequence Number,
-
:EFT_WRK.PARMLIST is derived from the other three bind variables.
Example: :EFT_WRK.PARMLIST should be “06 ZZ” (EFT File Number) since we defined the job to run as a part of the Pay Cycle process and the Pay Cycle Id and Sequence Number are “BUY06” (Payment to a Vendor) and “4” respectively.
While PeopleSoft processes are transaction oriented, TA is designed to work more generically. TA allows the user to provide the PeopleSoft Process Scheduler server with a transaction context for the process to run by specifying values for the command line parameters. With the use of TA , the user would not need to go through PeopleSoft menu navigation in order to run such a process.
Besides the bind variables illustrated on the Command Line Parameters tab above, the Process Scheduler also uses predefined PeopleTools meta-strings or server-based environment variables in the command line. These variables are enclosed in a set of double percent signs. There are rare situations when the user would need to override these variables as the TA and PeopleTools already manage these.
Example: The Output Handling tab gives the user the ability to specify Output Type, Output Format and Output Path. Specifying values other than the defaults for those is equivalent to overriding %%OUTDESTTYPE%%, %%OUTDESTFORMAT%% and %%OUTDEST%% on the Command Line Parameters tab. This is an option that advanced users more accustomed to writing command lines to run jobs may be interested in.
-
-
Click the Run Control Parameters tab to provide parameter value overrides for any parameter contained in the definition of the run control for the process.
TA will read the run control definition in PeopleSoft and populate this tab with the run control parameters and their current values providing the TA user with complete control over the PeopleSoft process.
The Parameter column lists the names of the parameters and the Value column lists the current parameter values. These current parameter values can be overridden by double-clicking the parameter and entering a new value via the Runcontrol Parameter Override dialog.
Variables available at the bottom of the dialog can be used to insert a predefined TA variable into the Override column.
-
Use the Run Control ID Override field to create a new run control ID from existing run control values.
-
If this text field is left blank, any changes (or overrides) made to the run control on this tab will permanently modify the original run control definition.
-
If a different run control ID is specified either directly or indirectly through a mask that resolves to an existing run control, that run control ID is updated with the modified values.
-
If a run control ID with the name or mask specified in this text field does not exist, then a new run control ID will be created with current and override values specified on this tab. For example, by including the <JobID> or date/time variable in the name entered into this text field, each job instance will generate a new and unique run control. This provides a comprehensive audit trail, but will cause run controls to accumulate over time.
Note: If a mask is specified that generates unique run control names, be advised that run controls will continue to accumulate; use this feature judiciously.
-
-
Click Website to access a third-party Web search page.
-
Click OK.