Creating a SAP Job
An SAP job consists of one or more job steps executed in sequence. You can change the sequence of the job steps, add or edit a job step, and delete various job steps as required.
SAP jobs can include different types of job steps.
Most SAP jobs are based on:
-
ABAP programs – Programs in the native SAP programming language.
-
External programs – Any other programs that are not native to SAP.
-
External commands – Predefined R/3 operating system commands.
-
Mass Activity – Large data volumes that can be processed in the shortest possible time.
However, if you are using the SAP Business Warehouse (BW) module and are licensed with TA for the BW functions, two other types of job steps are also available:
-
Infopackage – Predefined data loads (or extracts of data) identified with an Infopackage ID. When the infopackage launches in TA, it generates a job in SAP’s Computing Center Management System (CCMS) to create and process the data request.
-
Process Chain – A series of tasks designed and managed as a flow chart. The process chain consists of ABAP programs, infopackages, and other tasks.
You can create new job steps for the SAP job or import predefined job steps from existing SAP jobs. TA provides a way to load the job steps with their defined variants from another SAP job. This streamlines the process of defining SAP jobs by reusing existing job components.
To create an SAP job:
-
Click Definitions > Jobs in the Navigation pane to display the Jobs pane.
-
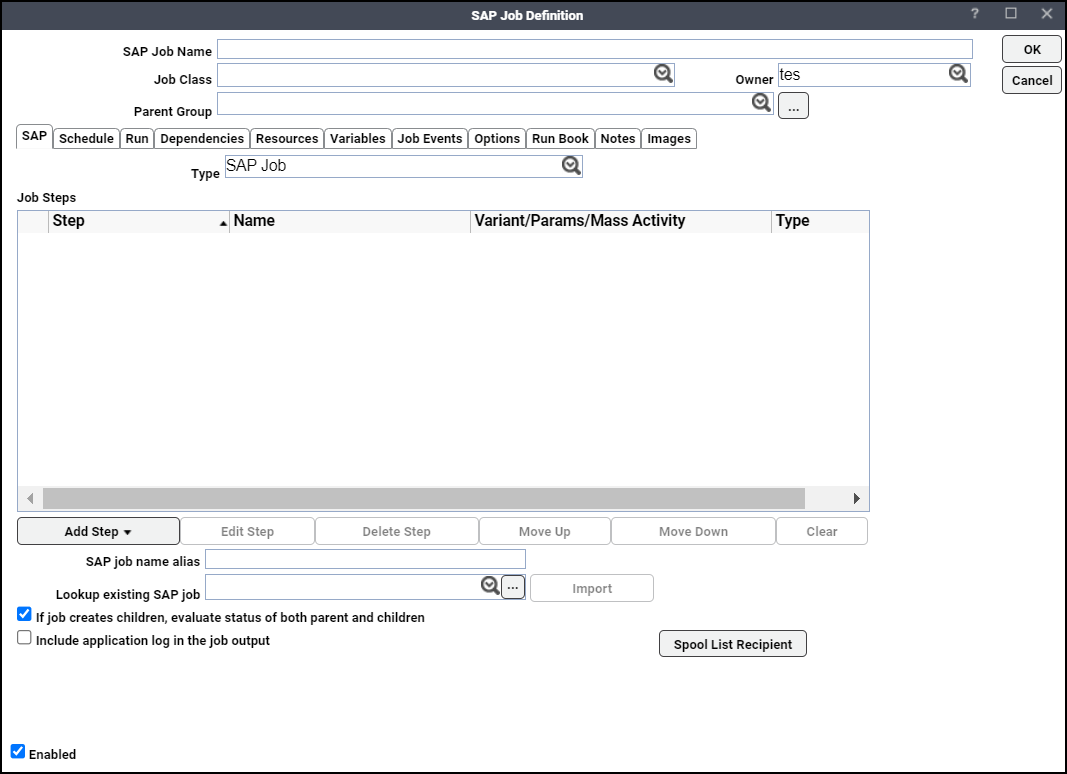
Right-click in either the Navigation or Jobs pane and choose Add Job > SAP Job from the context menu to display the SAP Job Definition dialog.
Note: The Add Job option is only available after having configured TA for SAP, as described in Configuring SAP.
-
Enter a name of up to 32 characters for your job in the SAP Job Name field.
Note: All characters are converted to uppercase with no spaces allowed so that the job in SAP can be created with the same name.
-
Choose from the Job Class list to assign a TA job class to this job. Classifications help to further categorize the job or job group. For example, you can have a classification for all payroll jobs or all accounting jobs. Queues can be set up with queue filters to accept jobs of a particular classification or a set of classifications
Note: This is TA’s job class, not the SAP job class used to prioritize a job.
-
Choose a new owner from the Owner list to change the owner of the job.
Note: The owner of an SAP job must have the SAP user as an authorized runtime user.
-
Click a group from the Parent Group list to put the job in an existing group or change the group the job is in currently.
Note: Unless the parent group selected has an SAP agent connection assigned, you must clear the Inherited option.
-
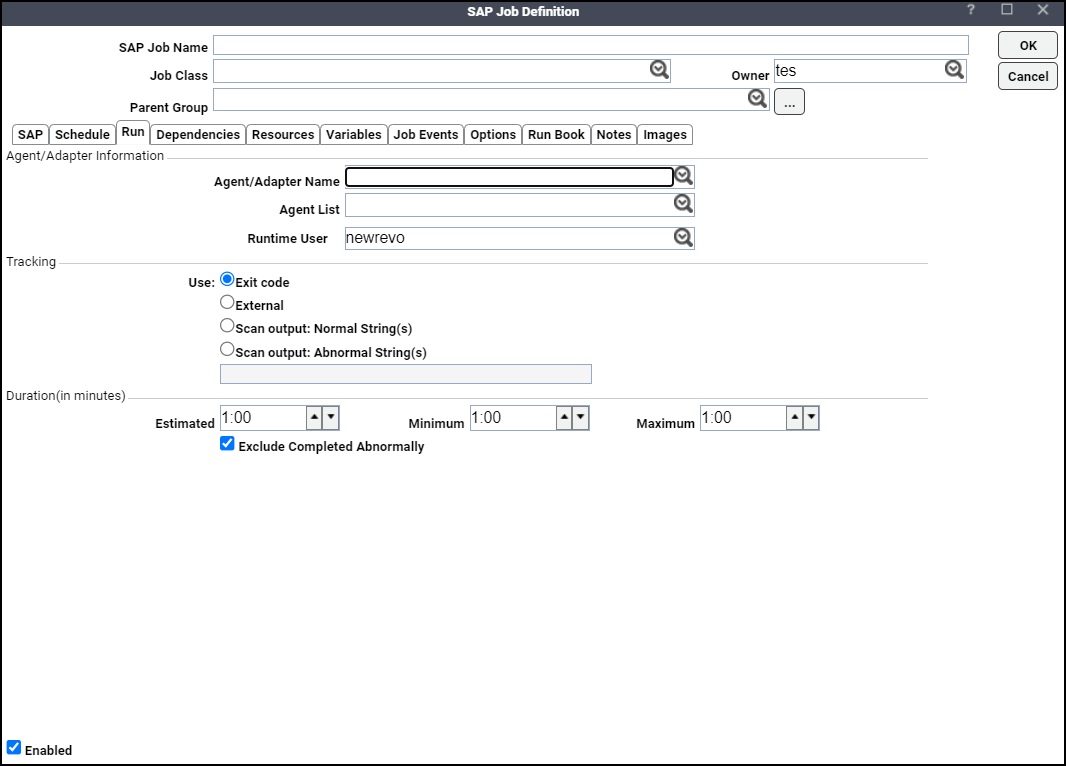
Specify this information:
-
Agent Name – The agent machine on which the program or script runs. You must use an agent that corresponds to one of the defined SAP connections.
-
Agent List Name – An agent list is a grouping of defined connections to SAP instances. Only SAP agent lists that were defined in the Agent List window are displayed. When the job runs, Tidal Automation attempts to connect with the first agent of the list and if unable to connect, proceeds to the next listed agent until a successful connection is established. You should ensure that the job can run on any of the connections in the agent list. If the job is assigned to a connection that it cannot run on, the job will fail with an Error Occurred status.
Note: The Agent Name and Runtime User lists are automatically filled with defaults if you have configured them in the system configuration. If you have defined an agent list of connections to multiple SAP instances, the connection can be selected from the Agent List.
Note: If you click an agent list, the Agent Name list is reset.
Note: If the job exists under a parent group, by default, all properties in the Agent Information section are inherited from its parent job group. If you want to override any one of these properties, clear the Inheritance option.
-
Runtime User – A list of users authorized to run a SAP job. This text field is filled in by default using the information in the SAP connection definition. If you are using a runtime user with an agent list, ensure that the runtime user is valid for all of the connections in the agent list. The job will fail if assigned to an agent without the specified runtime user.
Note: You can clear the above options by right-clicking in them and selecting Clear Selection from the context menu or by pressing the Delete key.
-
Exit Code – The job completion status is determined by the job’s exit code. An exit code of 0 sets the job status to Completed Normally. Any other exit code sets the job status to be Completed Abnormally. The exit code value can be any integer value.
The exit code of a job is set depending on the type of agent and script you are using. The exit code is determined using the ocsexit command at the end of the batch or command file run by a job.
-
External – Selecting this option means that the status of a completed job is determined externally by a user or program. Scheduler will set the job status to Externally Defined when the job completes. You can then have the active job completion status set through an action or use the Set command from the Job Activity context menu.
-
Scan Output: Normal String – Select this option if you want a particular text string in the output from a job to determine that a job completed normally. In the associated text field, enter the text string that signifies normal.
-
Scan Output: Abnormal String – Select this option if you want a particular text string in the output from a job to determine that a job completed abnormally. In the associated text field, enter the text string that signifies abnormal.
Note: You can scan job output for multiple strings. Listing multiple text strings separated by commas means any one of the listed text strings can signal that the job completed normally or abnormally. Listing text strings separated by plus signs means all of the text strings must appear in the job output to determine if the job completed normally or not. If the text strings contain commas or pluses, enclose the text string in quotation marks. You cannot mix commas and pluses together.
-
Estimated – The estimated duration for the job specified in minutes or a fraction thereof. The estimated run time is used to create the forecast shown in the Bar Chart pane of the Job Activity window. You can use the estimated duration to monitor jobs that run shorter or longer than expected. For example, you could set up a job event and job action to notify you when a certain job, that normally runs five minutes, runs for more than one hour.
-
Minimum – The minimum duration of time that you expect your job to run. You can create a job event to monitor and perform an action if the job completes in less than the minimum time. For example, you could set up a job event and job action that runs a diagnostic tool if the job completes in less than the specified minimum time.
-
Maximum – The maximum duration of time that you expect your job to run. You can create a job event to monitor and perform an action if the job runs over the maximum time. For example, you could set up a job event and job action to stop the job if it runs past the specified maximum time.
-
-
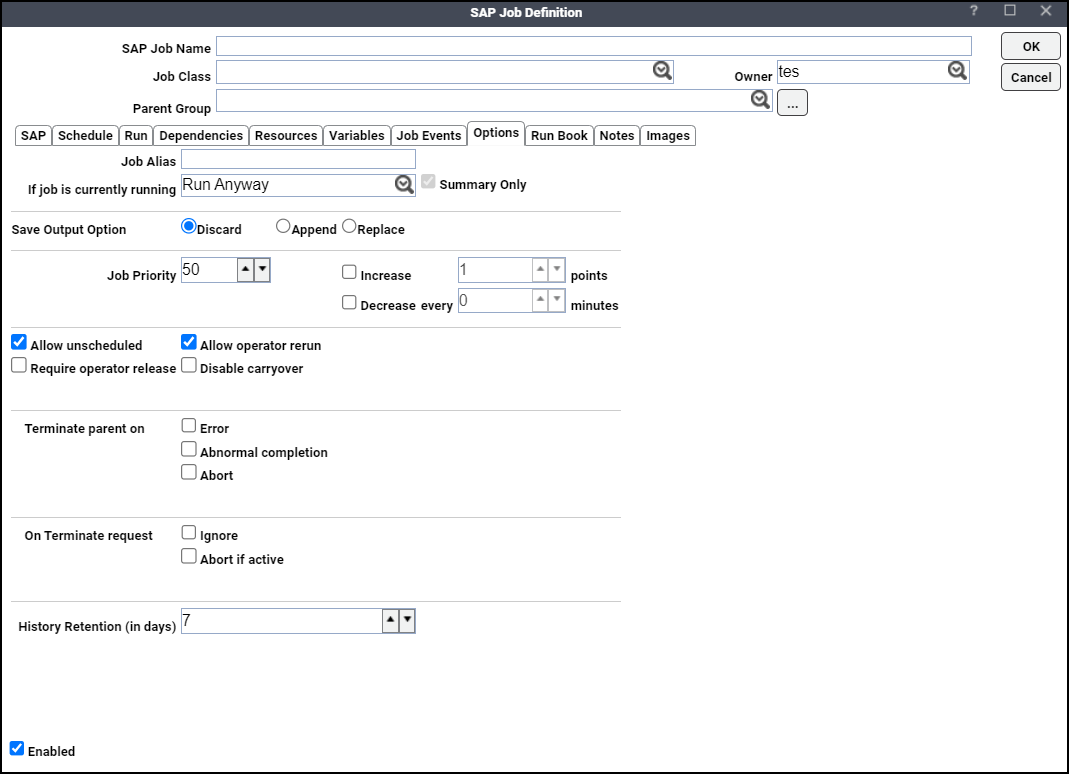
Click the Options tab and click the desired Save Output Option setting to override the default setting for job output set in the Defaults tab of the System Configuration dialog, of an individual job instance. The Summary Only for ERP Jobs setting can also be modified from here.
-
Click the SAP tab.