LDAP Groups
An LDAP group contains a list of LDAP users with privileges assigned uniformly to all LDAP members in the group. LDAP groups are often used to define the access rights for roles
Example: A TR_Admin group might have different rights than a TR_DevOp group.
LDAP (and ActiveDirectory) enable centralized control of the access rights that a user has to all of the applications in the enterprise. The LDAP Groups function can manage what organization unit (OU) a user belongs to, cost center(s) for financial chargeback purposes, and other information.
When an LDAP user logs into Tidal Repository, TR validates the user credentials against LDAP.
Once authenticated, the Tidal Repository obtains the user’s LDAP group(s). Tidal Repository creates an LDAP user if not already present, and only if the user belongs to an LDAP group defined in Tidal Repository.
Note: An LDAP user can access Tidal Repository by providing the combination: username (without domain) and password. An AD user can access Tidal Repository by providing any of the combinations: domain/username and password; domain\username and password; username@domain and password.
Things to remember about LDAP Groups/LDAP users
-
LDAP group is required to match the corresponding group in the Active Directory (AD).
Note: You cannot add an AD user that does not have an LDAP defined.
-
LDAP users can own business objects.
-
LDAP groups cannot own objects.
-
LDAP group is not editable in the system nor can the LDAP Group delete an LDAP member.
Configuring AD/LDAP
To configure an AD/LDAP group:
-
Go to the folder where Tidal Repository is installed.
-
Open the Config folder.
-
Open the application.properties file and add the properties:
For an active directory:
directory.service.enabled=true
directory.service.ssl=true or false
(see Configuring AD/LDAP under SSL below)
directory.service.type=AD
ad.host=123.12.123.12
ad.port=389
ad.rootDn=dc=dv,dc=local
For a lightweight directory:
directory.service.enabled=true
directory.service.ssl=true or false
(see Configuring AD/LDAP under SSL below)
directory.service.type=LD
ldap.host=123.12.123.12
ldap.port=10389
ldap.rootDn=dc=tidal,dc=com
ldap.user.search.base=ou=STA Group
ldap.user.object.class=person
ldap.user.identifier.type=cn
Configuring AD/LDAP under SSL
If an AD/LDAP server uses SSl protocol for communication (when LDAP traffic is confidential and secure by using SSL technology), additional configuration of Tidal Repository is required.
To configure AD/LDAP under SSL:
-
Go to the folder where Tidal Repository is installed.
-
Open the Config folder.
-
Open the application.properties file and configure LDAP as follows in the Configuring AD/LDAP section. Make sure the property is set to true:
directory.service.ssl=true.
-
Retrieve a certificate from the AD/LDAP server and import to a Java TrustStore:
-
Determine if the KeyStore file already exists on the server:
sudo keytool – list -v -keystore < JAVA_PATH/lib/security/cacerts>
-
Retrieve a certificate from the server:
openssl s_client -connect host:port -showcerts
-
Copy a certificate to a separate PEM file.
-
Import a certificate to the truststore:
sudo keytool -importcert -file <certificate_location> -keystore <JAVA_PATH/lib/security/cacerts> -alias <alias> -storepass <pass>
Example: Go to the <JRE_HOME>\bin folder to run commands from (since a keytool should be under <JRE_HOME>\bin folder).
Linux:
Example: keytool -importcert -file /home/tidal/Downloads/123.12.123.12.crt -keystore /usr/java/jdk1.8.0_241-amd64/jre/lib/security/cacerts -alias 123.12.123.12 -storepass changeit
Windows:
Example: keytool -importcert -file "C:\Users\user\Downloads\123.12.123.12.crt" -keystore "C:\Program Files\Java\jre1.8.0_231\lib\security\cacerts" -alias 123.12.123.12 -storepass changeit
-
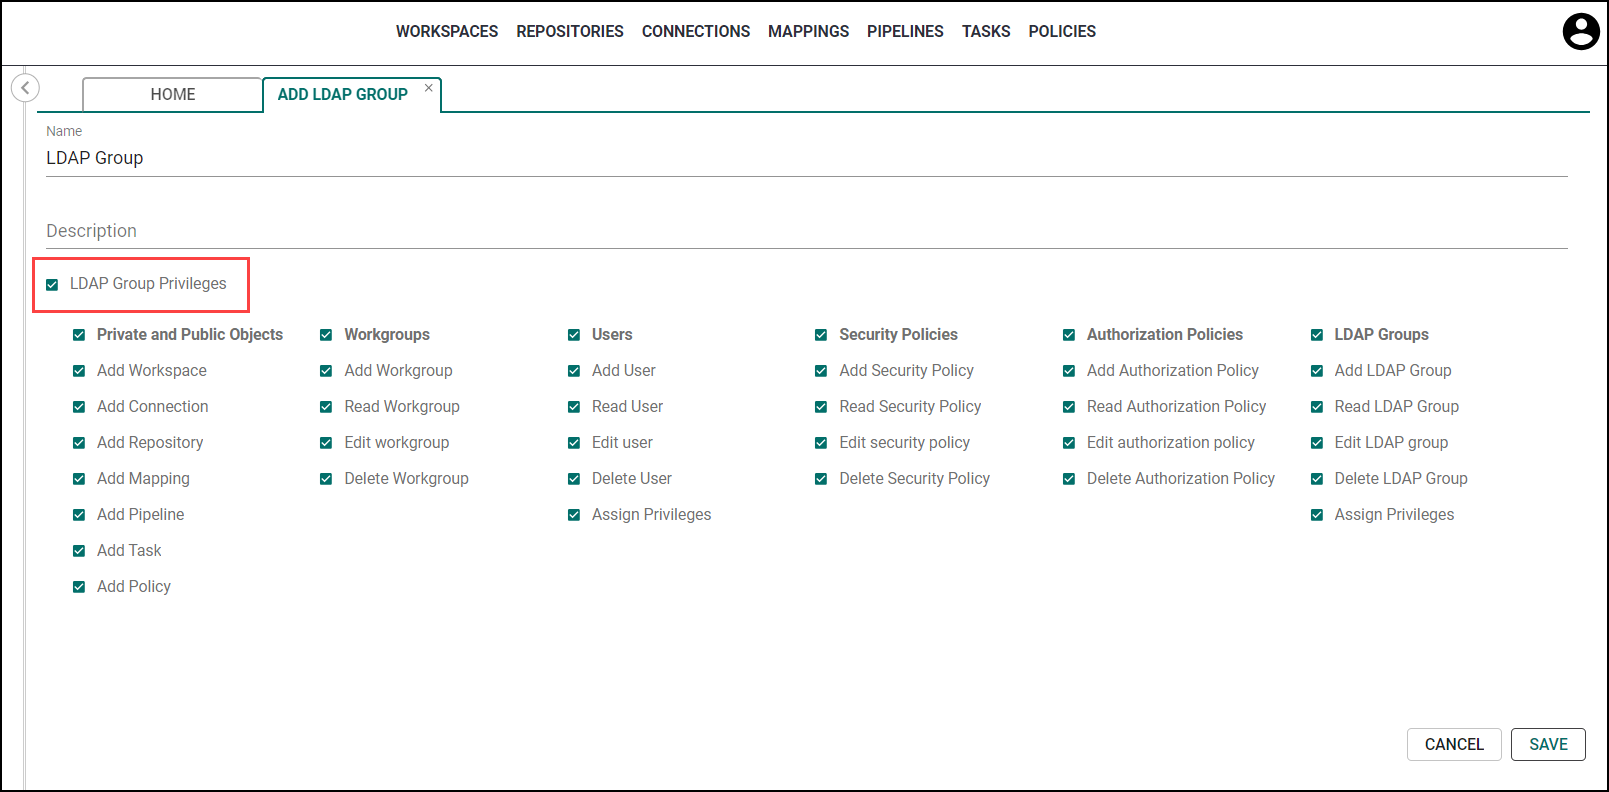
Adding an LDAP Group
To add an LDAP group:
-
Click LDAP Groups in Account menu to open the LDAP Groups tab.
-
Click Plus on the LDAP Groups tab to add a new LDAP group. The Edit LDAP Group tab appears.
-
Enter the Name (required) and Description (optional) fields on the Add LDAP Group tab.
-
Choose the LDAP Group Privileges to be assigned.
To choose privileges for the LDAP Group, check the LDAP Group Privileges checkbox:
Public and Private Objects
Workgroups
Users
Add Workspace
Add Connection
Add Repository
Add Mapping
Add Pipeline
Add Task
Add Policy
Add Workgroup
Read Workgroup
Edit Workgroup
Delete Workgroup
Add User
Read User
Edit User
Assign User Privileges
Security Policy
Authorization Policy
LDAP Groups
Add Security Policy
Read Security Policy
Edit Security Policy
Delete Security Policy
Add Authorization Policy
Read Authorization Policy
Edit Authorization Policy
Delete Authorization Policy
Add LDAP Group
Read LDAP Group
Edit LDAP Group
Delete LDAP Group
Assign Privileges
-
Check the LDAP Group Privileges checkbox to choose privileges for the LDAP Group.
-
Click Save to confirm adding the configured LDAP group.
Editing an LDAP Group
To edit an LDAP group:
-
Click Edit on the LDAP Groups tab.
-
Make your changes on the Edit LDAP Group tab.
-
Click Save to apply the changes.
Deleting an LDAP Group
To delete an LDAP group:
-
Click Delete on the LDAP Groups pane.
-
Click Accept In the Remove dialog to confirm your action.
Note: Deleting an LDAP group disables all LDAP group members that don’t belong to any other LDAP group honors. If an LDAP user belongs to other LDAP groups, the user remains a member of those undeleted groups.