Policies
A policy is a business object that consists of rules that allow users to modify Tidal Automation jobs in either a repository or connection.
You cannot modify or create TA jobs that do not conform to policy rules.
Each policy has an owner and can be shared, by the owner, with other users, LDAP groups, or workgroups. The users can view, create, edit, copy or delete a policy if they have corresponding permissions.
Policies can be assigned to the repository or connection upon the creation or updating of either the repository or connection.
|
Objects |
Possible actions allowed by the policy |
|---|---|
|
Repository |
|
|
Connection |
Movement to a connection |
You cannot modify or create TA objects that do not conform to policy rules.
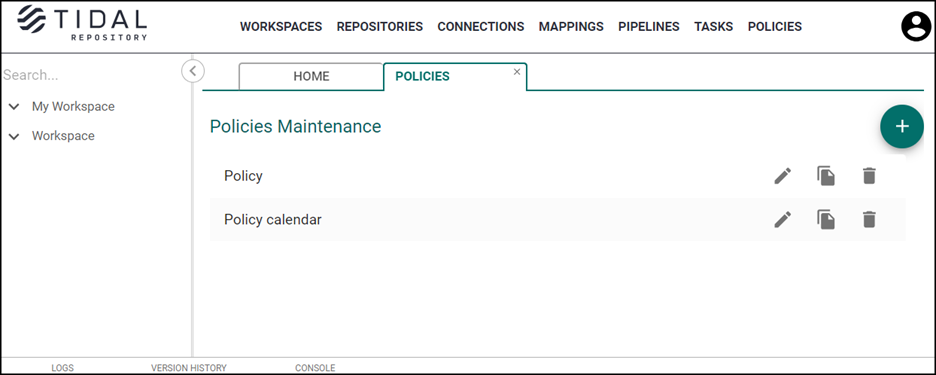
Policies Listing
The Policy tab shows a list of all available policies created in the Tidal Repository.
Note: You must have permissions to view, edit, or delete policies. If you have view-only permissions, the Edit and Delete next to the policy will be disabled.
To view the information about the policy, follow these steps:
-
Click Policies on the Main menu.
-
Click the desired policy from the list.
Note: To view its creation as well as last modification date, and policy description, if applicable, click the policy.
Viewing a Policy added to the Workspace
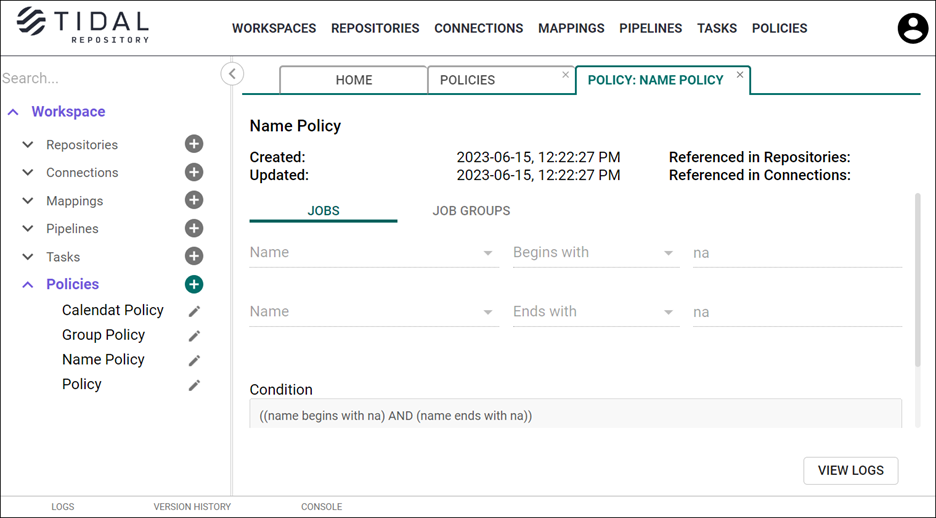
To view the security policy:
-
Expand Policies in the Workspaces pane to display a list of policies that were added to the workspace.
-
Choose the policy from the list. On the Policy tab, you can view the policy details in read-only mode.
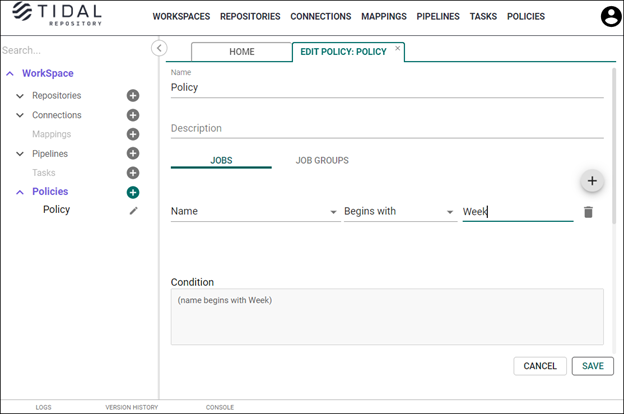
Creating a Policy
To create the security policy:
The policy’s rules allow making changes to the Tidal Automation jobs.
-
Click Policies on the Main menu.
-
Click Plus on the Policies tab.
-
Specify the Name (required) and Description (optional) on the Add policy tab. On the right side, click Plus to choose the job attributes that you want to apply policy rules to. You will find the list with different options.
The values for these attributes originate in the Job Definition screen in Tidal Automation. This table shows the attributes and where they are located (tab/field) in the Job Definition screen.
Note: The Save Output option and Priority options do not apply to the Job Groups.
Note: When you specify the job’s attributes and rules, they are displayed in the auto-generated Condition field.
Attribute
TA Tab
TA Field
Name
Job Definition screen
Job Name
Runbook
Run Book tab
Operator Instructions
Notes
Notes tab
Other Notes
Owner
Job Definition screen
Owner
Load URL (Notes)
Load URL checkbox
Notes
Load URL (Runbook)
Load URL checkbox
Run Book
Tag
Job Definition screen
_
Variable
Variables
Job Variable
Calendar
Schedule
Calendar Name
Alias
Options
Job Alias
Priority
Options
Job Priority
If a job is currently running
Options
If a job is currently running
Base time needed to run job on
Options
Base time needed to run job on
If not enough time before outage
Options
If not enough time before outage
Save Output option
Options
Save Output option radio button
Allow unscheduled
Options
Allow unscheduled checkbox
Require operator release
Options
Require operator release checkbox
Allow rerun
Options
Allow operator rerun checkbox
Disable carryover
Options
Disable carryover checkbox
For Unix, source user’s profile
Options
For UNIX, source user’s profile checkbox
History retention (in days)
Options
History retention in days
-
The rules with the same job’s attribute and condition type are grouped together using an “OR” operator. “OR” operator means that at least one of the policy rules must be met. The rules with different condition types are grouped together using “AND” operator. “AND” operator means that all policy rules must be met.
-
Use the User/Workgroup toggle to choose a policy owner and choose the policy owner’s name from the dropdown list. The owner is a designated user (non-LDAP or LDAP) or workgroup.
-
Use the Share/Public toggle to choose whether the policy is shared (access is limited to users you designate) or public (everyone can see the policy).
-
If Share is selected, the policy can be shared with any users, workgroups, and LDAP groups.
-
If Public is selected, the policy is shared with all Tidal Repository users in the Read mode.
-
-
Click Save to add the configured policy.
Assigning a Policy to a Repository or Connection
To assign the security policy:
-
Navigate to the desired Workspace in the Main menu and click Edit.
-
Click the already-created policy from the dropdown list in the Policies field, and then click Save to apply the changes.
-
Click Expand next to the Repositories or Connections in the Navigation pane.
-
Click the repository or connection, and then click Edit.
-
Click the policy in the Policies field. You can add more than one policy.
-
Specify the condition for the policy. There is a possibility to specify either Must be met or May be met.
Note: If you choose all policies as Must be met, all policy conditions must be met to apply.If you have only one policy and it is marked as May be met, the policy is considered as Must be met. If all the policies you have selected are marked as May be met, at least one of the policies will be identified as Must be met.If there are two policies, each of which has either Must be met or May be met condition, the policies will be obligatory to apply.
-
Click Save to confirm your action.
Editing a Policy
To edit the security policy:
-
Choose the desired policy from the Navigation pane and click Edit next to the name of the policy.
OR
Click Policies on the Main menu. On the Policies tab, click Edit for the policy you want to change.
-
Make your changes on the Edit Policy tab and click Save to apply them.
Coping a Policies
Note: Make sure to clear the cache before using the copy functionality.
To copy the policy:
Note: You must have the permission to edit a policy. If you have view-only permissions, the Copy button next to the policy will be disabled.
-
Click Policies on the Main menu.
-
Click Copy for the policy that you want to copy.
-
Click Accept on the Copy dialog to confirm your action.
Once you copied the policy, it appears in the list on the Policies tab, so you can modify it.
Note: The user who initiates the Copy process is now the owner of the copied policy.

Deleting a Policy
You cannot delete a policy that is already applied to a repository or a connection. To delete the policy, unassign it from the repository or connection.
Note: Deleting a policy is available via the Main menu.
To delete the security policy:
-
Click Policies on the Main menu to open the Policies tab.
-
Click the desired policy to be removed and click Delete.
-
Click Accept in the Remove dialog to confirm your action.