Upgrading Windows Backup Master
Follow the steps below to upgrade Tidal Automation Backup Master to Tidal Automation 2024.3.
Note: Be sure to back up the config directory before proceeding with this upgrade.
The upgrade program upgrades the Backup Master. Before upgrading, turn on diagnostic logging to collect information during the upgrade procedure. This precaution provides troubleshooting information if any difficulty is encountered during the upgrading process.
To turn on diagnostic logging, open System Configuration, navigate to the Logging tab, and put Scheduler Log in High Debug.
Note: When upgrading the Windows Backup Master, the Microsoft SQL port number in the master.props file of the config directory is changed to 1433 by default. If your port number is not 1433, change this setting in the master.props file to the port number you are using.
To upgrade the Windows Backup Master:
-
Complete all prerequisites in Upgrade Prerequisites.
If your installation uses an Oracle database, your database administrator should add these Oracle privileges to the TA user account in Oracle before beginning the upgrade procedure or the upgrade will fail:
-
Create trigger
-
Create sequence
-
-
Ensure that the system queue has been set to 0 so no new jobs will launch. Navigate to Tidal > Definitions > Queues, choose the system queue and set the limit to 0.
-
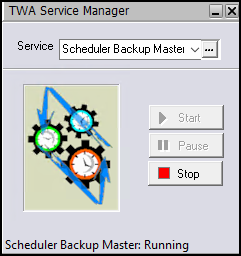
Stop the Backup Master service through the TA Service Manager.
-
Click Start > All Programs > Tidal Automation > TA Service Manager. The TA Service Manager dialog displays.
-
Choose Scheduler Backup Master from the Service list.
-
Click Stop.
-
-
Run the setup.exe file.
-
Click Run. The Welcome panel displays.
-
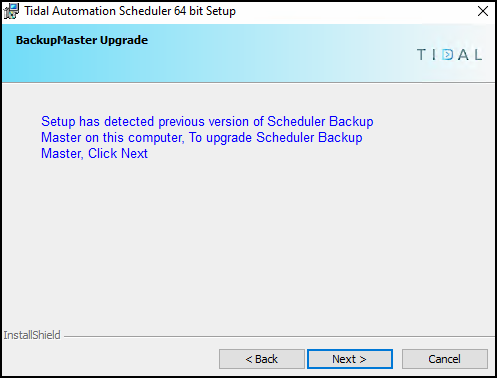
Click Next. The Master Upgrade panel displays that the setup has detected previous version of Scheduler Backup Master on this compute.
-
Click Next to upgrade Scheduler Backup Master.
-
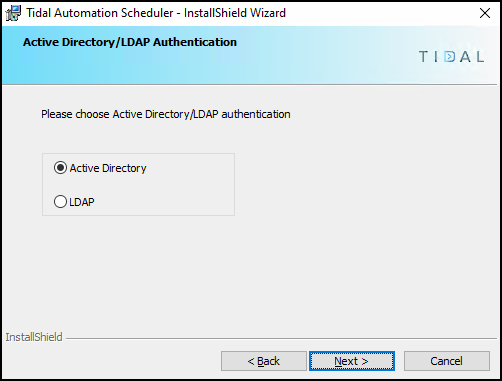
Choose the authentication method and click Next.
-
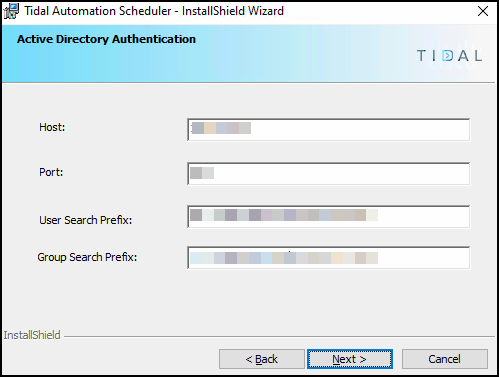
Click Next in the Active Directory Authentication panel.
-
Click Install to start the upgrade process.
-
Click Finish when you reach the end of the upgrade procedure.
-
Open the Service Manager, choose Scheduler Backup Master, and click start to launch the Master.