Installing for Linux
Installing the Explorer Service for Linux
To install the New Explorer:
-
Download the Tidal Explorer software from support.tidalsoftware.com.
-
Extract the files.
-
Copy TE-Service-install.bin to the target machine.
-
Change the permissions on the copied TE-Service-install.bin file to make the file executable by entering:
chmod u+x TE-Service-install.bin
-
Being the installation program by entering: sh ./TE-Service-install.bin
When the installation program starts, the installation splash screen is displayed and the introduction panel follows.
Note: After reading the introductory text that explains how to cancel the installation or modify a previous entry on a previous screen, click Next.
-
Choose the installation folder. Click Next to accept the default location or Choose to browse the directory tree to the desired install directory.
-
Click Next. The Java Executables panel displays. Browse to the directory path containing the libjvm.so shared library and enter the desired JVM ARGS settings.
-
Click Next. The ASP.NET Core Environment panel displays. Specify the environment variable value identifying the name of the app settings file used by the Explorer Service.
-
Click Next. The Authentication Mode panel displays.
-
Choose the Active Directory or LDAP option.
-
Click Next.
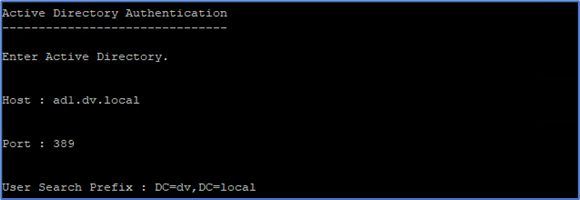
The Active Directory Authentication panel is displayed if you selected the Active Directory option in the Authentication Mode panel.
For Active Directory, enter this information:
-
Host – Enter the hostname or IP address for the Active Directory server.
-
Port – Enter the port number for the Active Directory server.
-
User Search Prefix – Enter the location you want Active Directory to search for users.
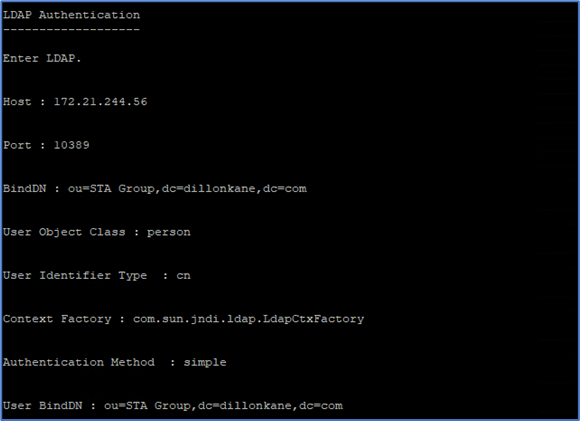
The LDAP Authentication panel is displayed if you selected the LDAP option in the Authentication Mode panel.
For LDAP, enter this information:
-
Host – Enter the hostname or IP address for the LDAP server.
-
Port – Enter the port number for the LDAP server.
-
BindDN – Enter the user account to query the LDAP server.
-
User Object Class – [default person] Specify a valid object class for the BindDN user. Only users who possess one or more of these objectClasses are permitted to authenticate.
-
User Identifier type – [default cn].
-
Context factory – Enter the context factory.
-
Authentication Method – [default simple] Enter the authentication method.
-
User BindDN – Enter the BindDN.
Note: Tidal Explorer supports Multi-Domain LDAP Authentication by adding a multi-domain file reference Security.Authentication.Ext.File=user-auth.xml line to the explorer.props file. Please refer to the section ‘Enabling Multi-Domain Authentication’ in the Tidal Automation™ Installation Guide for details.
-
-
Click Next. The DOTNET_ROOT folder panel is displayed.
Accept the default folder or click Browse to select the folder to contain the certificate store used by the Explorer Service.
-
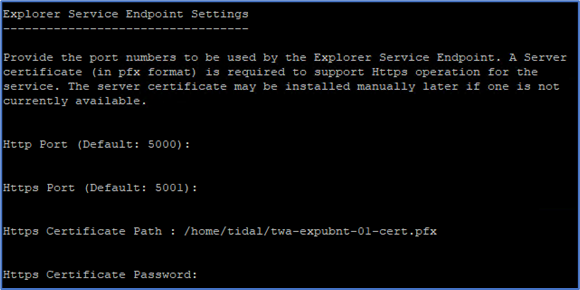
Click Next. The Explorer Service Endpoint Settings panel is displayed.
Enter these information:
-
Http Port – Enter the port number used by the Explorer Service for http.
-
Https Port – Enter the port number used by the Explorer Service for https.
-
Https Certificate Path (Optional) – Enter the full path to the Explorer Servers certificate (in pfx format). The server certificate must be signed by a rootCA and meet the requirements for an Explorer Server Certificate described in the Section Explorer Service Certificate Requirements and Generation’. Leave blank if no certificate is available at install time.
-
Https Certificate Password (Optional) – Password for the pfx format certificate. Leave blank if no certificate is available at install time.
-
-
Click Next. The Connect Explorer to Primary Master panel is displayed.
Enter the hostname information for the Primary Master to be initially connected to the explorer service or leave blank to defer the Primary Master connection configuration.
Note: If your Tidal Master is configured for Fault Tolerance with a Primary Master, Backup master and Fault Monitor then you should skip this installation step. Connection to the Tidal Master can be configured using the Tidal Explorer Admin tool following successful installation.
If your Tidal Master is configured for SSL messaging, then Explorer should also be configured for SSL Messaging manually. See Configuring SSL Messaging for Tidal Explorer/Masterlink.
-
Click Next. The Master Database Type panel is displayed.
-
Click the option for your Master Database Type.
-
Click Next. The Master Database Details panel is displayed.
-
Enter this Master Database connection information:
-
Hostname – hostname for the DB server.
-
Port – Port used by the DB server.
-
Database Name – Name of Master database.
-
Username – Name of DB user login with read only access to the Admiral Database.
-
Password – Password for the DB user login.
-
Custom Connection String (Optional) – Alternatively, you can provide a custom connection string appropriate to the database type. Note that the Explorer Service uses Dot Net Core DB Client libraries to access the Admiral Database. The supplied custom connection string must be compatible with the appropriate Database and client library.
MSSQL use SQL Client Connection String – Sample
Example: Data Source=myserver,1433;Initial Catalog=admiral;Integrated Security=False;Persist Security Info=True;User ID=tidalrd;Password=mypassword;Connection Timeout=2;TrustServerCertificate=True;
PostgreSQL use an NPGSQL Client Connection String–Sample
Host=myserver;Port=5432;Database=admiral;Username=tidalrd;Password=mypassword;Timeout=2;Oracle use an Oracle Client Connection String – Sample
Example: DATA SOURCE=(DESCRIPTION = (ADDRESS = (PROTOCOL = TCP)(HOST = <hostname>)(PORT = 1521)) (CONNECT_DATA = (SERVER = DEDICATED) (SERVICE_NAME = orcl)));USER ID=tidalrd;PASSWORD=mypassword;Connection Timeout=2;
DB display name in Explorer – The Database name displayed in the explorer client.
-
-
Click Next. The Super User for Explorer Admin as Explorer License file panel is displayed.
Enter this for the Tidal Explorer [TE] SuperUser and License file:
-
Domain (Optional) – Enter the Domain name for the TE SuperUser. Required if using Active Directory Authentication.
-
Username – Enter the username for the TE SuperUser.
-
License (Optional) – If a license file is available then enter the path to the Explorer license file or click Browse to select the license file.
-
-
Click Next. The Explorer Data and Log Storage Folder panel is displayed.
The Explorer Service captures and stores its logs and data from connected Tidal Masters in the installation folder. Click Browse to select an alternative DataStore location. The user that runs the service must be able to read, write, and delete files in the selected DataStore folder for successful operation.
-
Click Next. The Pre-Installation Summary panel is displayed.
Note: A timezone must be defined for the user on the Linux server.
-
Click Install. The Installing panel is displayed.
After installation. The Post-Installation Summary panel is displayed. The summary shows the result of a configuration check of the installation together with the location of the detailed installation log. In order to fully pass the configuration check, all required configuration elements need to be installed including certificates, and an explorer license.
-
Click Next. The Install Complete panel is displayed.
-
Click Next to exit the installer.
Verifying Successful Installation
Verify that the installation program installed all required files by going to the explorer installation location that you designated and listing the directory contents with the command:
ls -laR
The installed components are listed at the top with the contents of the LINUX, lib and config directories also displayed.
The environment variables created by the installation procedure are defined in one of the files in the users account
~/.bash_profile
~/.bash_login
~/.profile
To setup the environment variables you should login to the linux machine in a new session.
Verify the explorer service configuration is complete by running the command in the explorer install folder.
./explorerutil config check
New Explorer for Linux Installation from the Command line
To install the New Explorer for Linux Installation from the Command line:
-
Download the Tidal Explorer software from support.tidalsoftware.com.
-
Extract the files.
-
Copy TE-Service-install.bin to the target machine.
-
Change the permissions on the copied TE-Service-install.bin file to make the file executable by entering:
chmod u+x TE-Service-install.bin
-
Begin the installation program by entering:
sh ./TE-Service-install.bin -i console
-
Click Enter. The screen displays as the installation program begins.

The initial installation screen is followed with the Introduction screen that provides instruction for proceeding with the installation program.
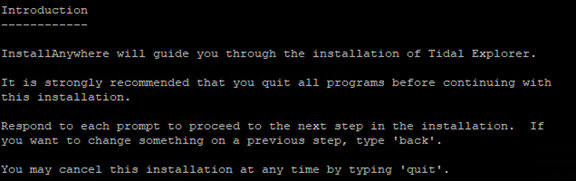
-
Click Enter. The Choose Install Folder screen displays.
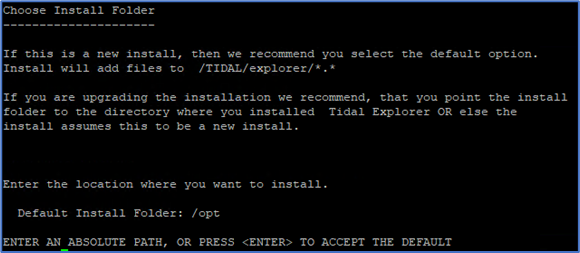
Enter the directory path where the Explorer files are to be installed. If you want to change the default directory, then enter the absolute path.
-
Click Enter. The Java Executables screen displays.
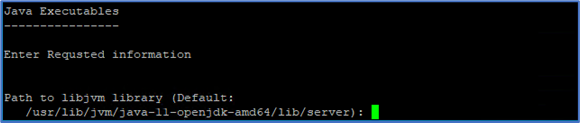
Enter the path to the directory that contains the java libjvm.so shared library if different from the default value
-
Click Enter. The JVMARGS prompt is displayed.

Enter the JVMARGS required if different from the default values.
-
Click Enter. The ASP.NET Core Environment screen is displayed.

Specify the environment variable value used to identify the name of the appsettings file that is used by the Explorer Service if different from the default value.
-
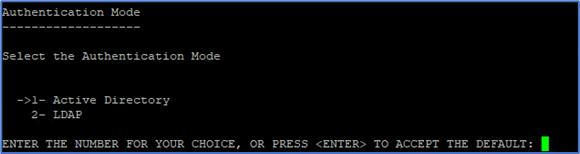
Click Enter. The Authentication Mode screen is displayed.
-
Type 1 and click Enter to display Active Directory Authentication screen OR Type 2 and click Enter to display the LDAP Authentication screen.
Provide each Active Directory or LDAP configuration value by typing the new value and clicking Enter.
After you have completed the Active Directory or LDAP configuration, the DOTNET_ROOT folder screen displays.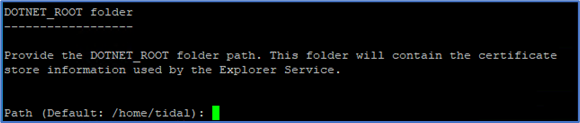
-
Enter the path to the directory to contain the Explorer Service certificate store if different from the default value.
-
Click Enter. The Explorer Service Endpoint Settings screen is displayed.
-
Enter values for the http and https ports if different from the default values.
-
Enter the full path to the Server (pfx) certificate and the certificate password or leave those fields blank if the certificate is not available.
When all settings have been processed the Connect Explorer to Primary Master screen is displayed:
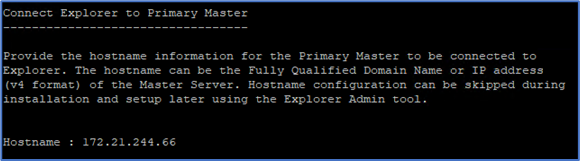
If a master hostname is specified then it must be running and accessible. If the master is not running, then the installation may fail with an ‘end of stream reached error’. To resolve this issue, either ensure the master is running and retry the installation or do not supply the master hostname information during installation.
-
-
Enter the value for the Primary Master Hostname or leave blank to skip this configuration step.
Note: If your Tidal Master is configured for Fault Tolerance with a Primary Master, Backup master and Fault Monitor then you should skip this installation step. Connection to the Tidal Master can be configured using the Tidal Explorer Admin tool following successful installation.If your Tidal Master is configured for SSL messaging, then Explorer should also be configured for SSL Messaging manually. See Configuring SSL Messaging for Tidal Explorer/Masterlink.
-
Click Enter. The Master Database Type screen is displayed.
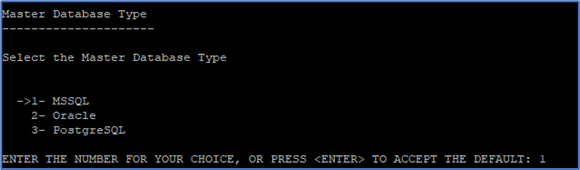
Enter 1 for MsSql, 2 for Oracle, or 3 for PostgreSQL.
-
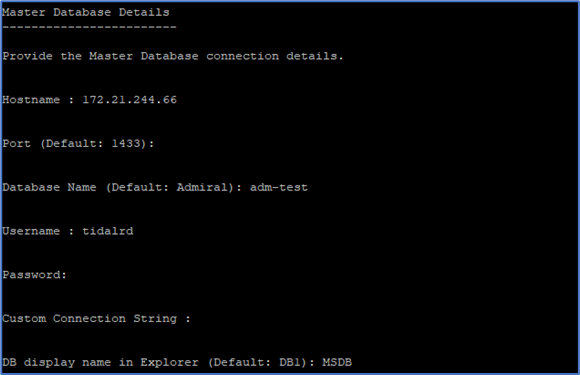
Click Enter. The Master Database Details screen is displayed:
-
Enter the DB connection information required for the database.
-
Hostname – hostname for the DB server.
-
Port – Port used by the DB server.
-
Database Name – Name of Master database.
-
Username – Name of DB user login with read only access to the Admiral Database.
-
Password – Password for the DB user login.
-
Custom Connection String (Optional) – Alternatively, you can provide a custom connection string appropriate to the database type. Note that Explorer Service uses Dot Net Core DB Client libraries to access the Admiral Database. The supplied custom connection string must be compatible with the appropriate Database and client library.
MSSQL use SQL Client Connection String – Sample
Example: Data Source=myserver,1433;Initial Catalog=admiral;Integrated Security=False;Persist Security Info=True;User ID=tidalrd;Password=mypassword;Connection Timeout=2;TrustServerCertificate=True;
PostgreSQL use an NPGSQL Client Connection String – Sample
Example: Host=myserver;Port=5432;Database=admiral;Username=tidalrd;Password=mypassword;Timeout=2;
Oracle use an Oracle Client Connection String – Sample
Example: DATA SOURCE=(DESCRIPTION = (ADDRESS = (PROTOCOL = TCP)(HOST = <hostname>)(PORT = 1521)) (CONNECT_DATA = (SERVER = DEDICATED) (SERVICE_NAME = orcl)));USER ID=tidalrd;PASSWORD=mypassword;Connection Timeout=2;
-
DB display name in Explorer – The Database name displayed in the explorer client.
-
-
Click Enter. The Super User for Explorer Admin screen is displayed.
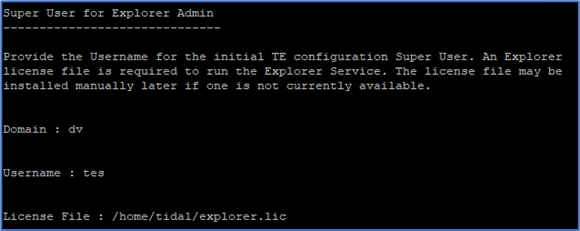
Enter this information for the Tidal Explorer [TE] SuperUser and License file:
-
Domain (Optional) – Enter the Domain name for the TE SuperUser. Required if using Active Directory Authentication.
-
Username – Enter the username for the TE SuperUser.
-
License (Optional) – If a license file is available then enter the full path to the Explorer license file.
-
-
Click Enter. The Explorer Data and Log Storage Folder screen is displayed.

The Explorer Service captures and stores its logs and data from connected Tidal Masters in the installation folder. Enter the full path to the required DataStore folder or accept the default value. The user that runs the service must be able to read, write and delete files in the selected DataStore folder for successful operation.
-
Click Enter. The Pre-Installation Summary screen is displayed.
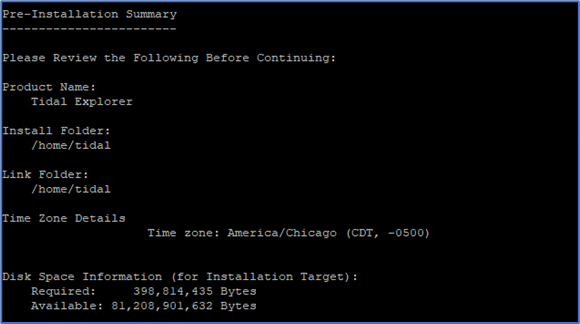
Note: A Timezone must be defined for the user on the Linux server for successful service operation.
-
Click Enter. The Installing screen is displayed during installation followed by the Post Installation Summary screen is displayed.

-
Click Enter. The Installation Complete screen is displayed.
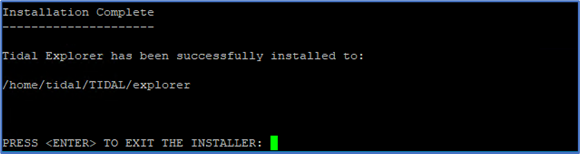
-
Click Enter. Exits the installer.
Verifying Successful Installation
Verify that the installation program installed all of the required files by going to the explorer installation location that you designated and listing the directory contents with the command:
ls -laR
The installed components are listed at the top with the contents of the LINUX, lib and config directories also displayed.
The environment variables created by the installation procedure are defined in one of the files in the users account:
~/.bash_profile
~/.bash_login
~/.profile
To setup the environment variables, you should login to the linux machine in a new session.
Verify the explorer service configuration is complete by running the command in the explorer install folder.
./explorerutil config check