Manually Configuring Explorer Service for Linux
Configuration items skipped in the installation process can be setup manually.
Manually installing an Explorer for Linux License
A new or updated explorer license file can be installed by copying the license file into the explorer installation folder and naming the file to explorer.lic
-
If the Explorer Service is not running, then start the service to pick up the new license.
-
If the Explorer Service is running, the service can be stopped and started. Alternatively, once the explorer.lic has been copied into the explorer folder, it can be applied to a running Explorer Service using the Explorer Admin tool that is connected to the service.
Manually installing and Managing Explorer Server PFX Certificates
Refer to the section ‘Creating Root and Server Certificates on Linux’ for details on how to create a signed PFX format server certificate.
Procedure to Install an Explorer PFX Server Certificate on Linux
Assuming the server certificate is located at /home/tidal/cert-out/myserver.acme.com-cert.pfx and uses password ‘test’:
-
Add the new server certificate to the Explorer Cert Store if it has not already been added using command
./explorerutil cert add /home/tidal/cert-out/myserver.acme.com-cert.pfx test
-
Set the environment variables in the users ~/.bash_profile, ~/.bash_login or ~/.profile:
ASPNETCORE_Kestrel__Certificates__Default_
Path=/home/tidal/cert-out/myserver.acme.com-cert.pfx
EXPORT ASPNETCORE_Kestrel__Certificates__Default__Path
ASPNETCORE_Kestrel__Certificates__Default__Password=test
EXPORT ASPNETCORE_Kestrel__Certificates__Default__Password
-
Source the edited profile
. ~/.bash_profile
Managing Explorer Server Certificates on Linux
The explorerutil tool manages the certificate store used by the Explorer Service. The certificate store (also named the Kestral certificate store) exists in the folder defined by the $DOTNET_ROOT environment variable created by the installer.
The pfx certificate store is located at:
$DOTNET_ROOT/.dotnet/corefx/cryptography/x509stores/my/*.pfx
The certificate store operations are available:
-
List the certificates installed in the certificate store using the command
./explorerutil cert list:

Note: Only a single certificate should exist in the certificate store.
The certificates Subject must be CN=ExplorerServiceCert.
The DNS entries displayed with SubjectAlternateName must correspond to the Linux Server hostname.
-
Install a pfx certificate file into the certificate store using the command
./explorerutil cert add <pfx> <pw>
Arguments:
<pfx> path to the pfx file<pw> password for the pfx file
-
Get the thumbprint of a pfx certificate file using the command:
./explorerutil cert thumbprint <pfx> <pw>
Arguments:
<pfx> path to the pfx file
<pw> password for the pfx file
-
Verify whether a certificate having a thumbprint exists in the certificate store using the command:
./explorerutil cert exists <thumbprint>
Arguments:
<thumbprint> thumbprint of the cert to be checked -
Delete a certificate having a thumbprint from the certificate store using the command:
./explorerutil cert delete <thumbprint>
Arguments:
<thumbprint> thumbprint of the pfx file.
Verifying the Explorer Service for Linux Configuration
Verify the Explorer Service configuration is complete by running the command in the explorer install folder.
./explorerutil config check
Upgrading an Explorer for Linux Installation
To upgrade an Explorer:
-
Download the Tidal Explorer software from support.tidalsoftware.com.
-
Extract the files.
-
Copy TE-Upgrade-Service-install.bin to the target machine.
-
Change the permissions on the copied TE-Upgrade-Service-install.bin file to make the file executable by entering:
chmod u+x TE-Upgrade-Service-install.bin
-
Being the installation program by entering:
./ TE-Upgrade-Service-install.bin
When the installation program starts, the installation splash screen is displayed and the introduction panel follows
Note: After reading the introductory text that explains how to cancel the installation or modify a previous entry on a previous screen, click Next.
-
Check that the upgrade pre-requisites have been met. Click Next to proceed.Choose the installation folder. Click Next to accept the default location or Choose to browse the directory tree to the desired install directory. The installer verifies:
-
The expected Explorer files exist in the selected installation folder. It will warn if the files are not found and give the option to change the location of the existing installation or abort the upgrade.
-
The Explorer Service is not running. It will warn if the service is running and gives the option to stop the services before proceeding or aborting the upgrade.
The Pre-installation Summary screen is displayed.
-
-
Click Install. The Explorer installation will be upgraded.
-
The upgrade process doesn’t change the existing explorer service explorer.props file. It must be edited manually to take account of the java version installed on the host machine.
Edit /opt/TIDAL/explorer/config/explorer.props to set the JAVA_HOME and JVM_DLL_PATH settings for the JAVA version installed on the host machine
Original explorer.props after upgrade
Example: JAVA_HOME=/usr/lib/jvm/java-11-openjdk-amd64|
JVM_DLL_PATH=/usr/lib/jvm/java-11-openjdk-amd64/lib/server/libjvm.so
explorer.props after edit to use java-17The upgrade process does not change the users environment settings. The LD_LIBRARY_PATH variable must be adjusted manually if required to take account of the java version installed on the host machine
Edit the users .profile to set the LD_LIBRARY_PATH environment variable to the path of the Java 17 libjvm.so directory on the host machineThe profile before edit:
Example: export LD_LIBRARY_PATH=/usr/lib/jvm/java-11-openjdk-amd64/lib/server
The profile after edit:
Example: export LD_LIBRARY_PATH=/usr/lib/jvm/java-17-openjdk-amd64/lib/server
Source the users .profile to update the user environment in the current user session.
-
Verify the explorer service configuration is complete by running the command in the explorer install folder ./explorerutil config check
The service can be restarted following a successful upgrade.
Upgrading an Explorer for Linux Installation from the Command line
To upgrade an Explorer:
-
Download the Tidal Explorer software from support.tidalsoftware.com.
-
Extract the files.
-
Copy TE-Upgrade-Service-install.bin to the target machine.
-
Change the permissions on the copied TE-Upgrade-Service-install.bin file to make the file executable by entering:
chmod u+x TE-Upgrade-Service-install.bin
-
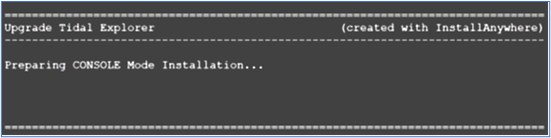
Begin the installation program by entering:
./ TE-Upgrade-Service-install.bin -i console
-
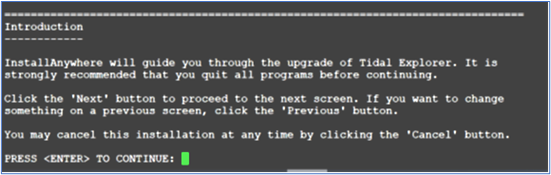
Click Enter. The screen displays as the installation program begins:
The initial installation screen is followed with the Introduction screen that provides instruction for proceeding with the installation program.
-
Click Enter. The Location of Explorer to upgrade screen displays.
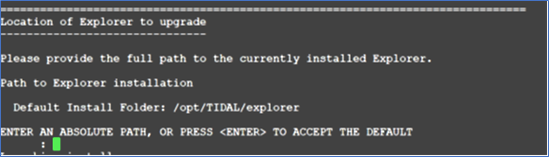
Enter the directory path to the existing Explorer installation. To change the default directory, enter the absolute path.\
The upgrade installer verifies that:
-
The expected Explorer files exist in the selected installation folder. It will warn if the files are not found and provides the option to change the location of the existing installation or abort the upgrade.
-
The Explorer Service is not running. It will warn if the service is running and give the option to stop the services before proceeding or abort the upgrade.
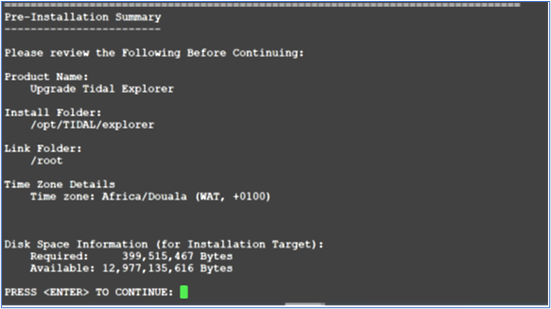
The Presentation Summary is displayed.
-
-
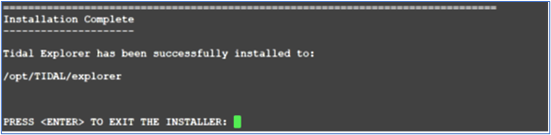
Click Enter. The Explorer installation will be upgraded:
-
The upgrade process does not change the existing explorer service explorer.props file. It must be edited manually to take account of the java version installed on the host machine.
Edit /opt/TIDAL/explorer/config/explorer.props to set the JAVA_HOME and JVM_DLL_PATH settings for the JAVA version installed on the host machine
Original explorer.props after upgrade
Example: JAVA_HOME=/usr/lib/jvm/java-11-openjdk-amd64
JVM_DLL_PATH=/usr/lib/jvm/java-11-openjdk-amd64/lib/server/libjvm.soExplorer.props after edit to use java-17
Example: JAVA_HOME=/usr/lib/jvm/java-17-openjdk-amd64
JVM_DLL_PATH=/usr/lib/jvm/java-17-openjdk-amd64/lib/server/libjvm.soThe upgrade process doesn’t change the users environment settings. The LD_LIBRARY_PATH variable must be adjusted manually if required to take account of the java version installed on the host machine
Edit the users .profile to set the LD_LIBRARY_PATH environment variable to the path of the Java 17 libjvm.so directory on the host machine.
The profile before edit:
Example: export LD_LIBRARY_PATH=/usr/lib/jvm/java-11-openjdk-amd64/lib/server
The profile after edit:
Example: export LD_LIBRARY_PATH=/usr/lib/jvm/java-17-openjdk-amd64/lib/server
Source the users .profile to update the user environment in the current user session.
-
Verify the Explorer Service configuration is complete by running the command in the explorer install folder.
./explorerutil config check
The service can be restarted following successful upgrade.