Business Views
The Business Views pane is a subset of the Jobs pane. It provides an alternate method of defining jobs. The Business Views pane offers a graphical way to create and modify jobs and their dependencies by clicking function buttons and dragging-and-dropping object icons from a toolbar. Using the mouse cursor, you can create workflows, rearrange the sequence of jobs and link dependencies to jobs as required.
Business Views Pane Interface
Accessing Business Views
Click Definitions > Jobs > Business Views on the Navigation pane, to display the Business View window. If you have created and saved Business Views, they are listed in the window.
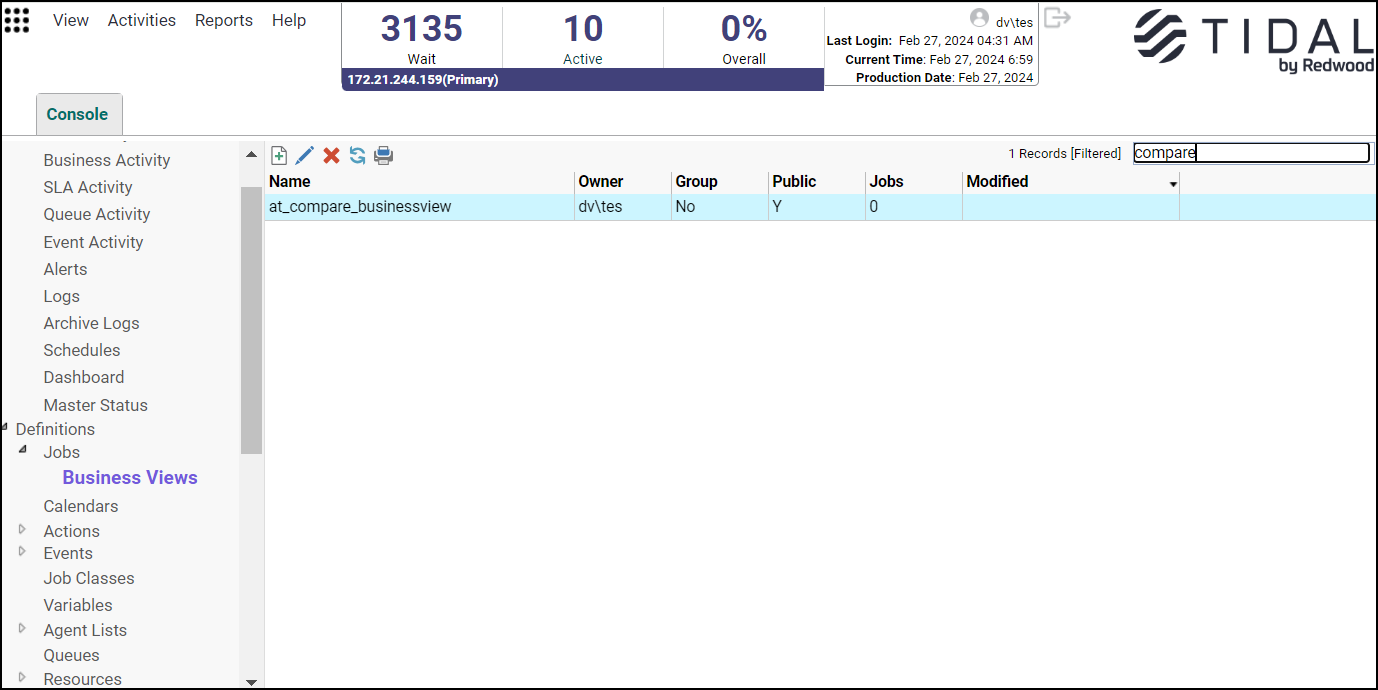
Note: The window is blank if you have not saved any Business Views.
The Business View window contains these columns of information about each listed View:
-
Name – The name of the View.
-
Owner – The user that owns (or created) the View.
-
Public – Indicates if the View is available to other users.
-
Group – Indicates if the View depicts a job group and its children.
-
Jobs – The number of jobs and groups depicted in the Business View.
-
Modified – The date and time that the View was last modified.
Business Views Preferences Dialog
While viewing the Business View window, click View > Preferences or right-click Business Views in the Navigation pane and choose Preferences from the context menu to display the Business Views Preferences dialog.
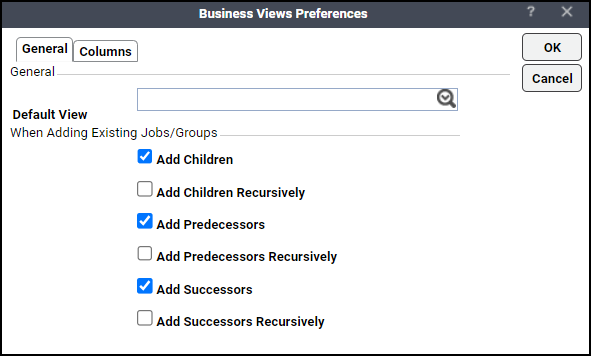
Business Views Preferences – General Tab
The General tab manages the recursive behavior of jobs in the Business Views screen.
The tab contains these elements:
-
Default View – Specifies that the selected Business View is the default View. This option assigns the properties of the default View to new Business Views.
-
Add Children – Automatically includes the immediate child jobs of any existing job group that is added to a View.
-
Add Children Recursively – Automatically adds successive generations of the children of all child job groups. If this option is selected, the Add Children option is automatically selected also.
-
Add Predecessors – Automatically includes the immediate predecessor jobs of any existing job or job group that is added to a View.
-
Add Predecessors Recursively – Automatically includes the immediate predecessors of a job and includes all other ancestors of those predecessors. If this option is selected, the Add Predecessors option is automatically selected also.
-
Add Successors – Automatically includes the immediate successor jobs of any existing job or job group that is added to a Business View.
-
Add Successors Recursively – Automatically includes the immediate successors of a job and includes all other descendants of those successors. If this option is selected, the Add Successors option is automatically selected also.
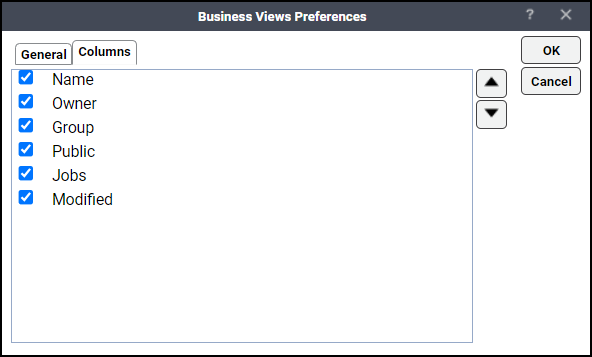
Business Views Preferences – Columns Tab
The Columns tab specifies which columns are displayed in the Business Views window and in what order the columns are arranged.
This tab contains these elements:
-
A check mark to the left of a column title indicates that it will be displayed in the window. No check mark indicates that the column will not be displayed.
To rearrange the order in which the columns are displayed, select the column and click the up or down arrow.
Navigation Context Menu
When you right-click the Navigation pane while Business Views is selected, the Navigation context menu displays.
This context menu contains these options:
-
Add Business View – Displays a new Business View screen.
-
Refresh – Updates the data in the current window.
-
Print – Displays a print preview screen of the information listed in the columns shown in the View window. From this screen, you can print a report of the information in the columns.
-
Select All - Selects all the existing Business views.
-
Export – Saves the data in the current window as an ASCII text file. You can then use the file data in other applications.
-
Preferences – Displays the Preferences dialog for the Business View window.
-
New Root Folder...– Creates ‘Custom’ folder in the Navigation pane.
Clicking the New Root Folder... from the context menu displays the New Root Folder dialog.
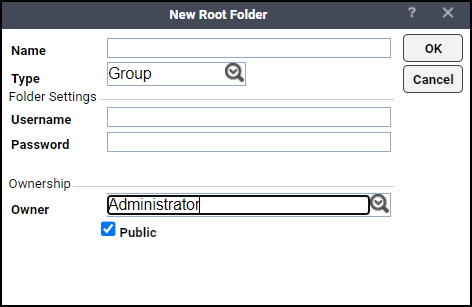
There are three folder types:
-
Root (Grouping)
-
URL
-
Grid View (JAC and Job Definition)
To create a Root folder:
-
Enter a name for the new folder in the Name field.
-
Choose Group from the Type list.
-
Choose an owner for the folder from the Owner list in the Ownership section.
-
Check the Public option if you want this folder to be available to others.
-
Click OK.
To create an URL folder:
-
Enter a name for the new folder in the Name field.
-
Choose URL from the Type list.
-
Enter the URL into the URL field.
-
Choose an owner for the folder from the Owner list.
-
Check the Public option if you want this folder to be available to others.
-
Click OK.
To create a Grid View folder:
-
Enter a name for the new folder in the Name field.
-
Choose Grid View from the Type list.
-
Choose a grid type from the Grid Type list.
-
Choose an owner for the folder from the Owner list.
-
Check the Public option if you want this folder to be available to others.
-
Click OK.
Business View Window Context Menu
You create, modify and delete Views from the context menu that displays by right-clicking the mouse from inside the Business View window or by clicking Add Business View on the toolbar of the Business View window.
This context menu contains these options:
-
Add Business Views – Displays a new Business View screen.
-
Edit Business Views – Displays the selected View.
-
Delete Business Views – Deletes the selected View.
-
Refresh – Refreshes the Business View screen.
-
Print – Displays a print preview screen of the information listed in the columns shown in the View window. From this screen, you can print a report of the information in the columns.
-
Print Selected – Prints the selected Business View.
-
Select All – Selects the existing Business Views.
-
Insert Job into Schedule – Schedules the Business View.
Business View Canvas
Clicking an existing View listed in the Business View window or selecting the Add View option displays the Business View canvas.
Click Definitions > Jobs > Business Views on the Navigation pane to access any Views that you have saved. The window is blank if you have not saved any Views.
The View’s canvas functions are controlled from the icons that run in a toolbar along the top of the screen. The creation and linking of job and dependency objects is controlled from a column of icons that run down the left side of the canvas.
You can drag-and-drop from most of the buttons to the View canvas to create objects. The same functions provided by these buttons are also available as options in the Business View Window Context Menu that is displayed by right-clicking anywhere on the View canvas.