Repositories
A repository can store multiple versions of a variety of object types. By transferring objects to a repository, you can quickly revert to a previous version of the repository including:
-
Jobs
-
Calendars
-
Resources
-
Events
-
Variables
-
Job Classes
-
Dashboard Element
-
Queues
-
Actions
-
Business views
-
Tags
-
Agent Connections
-
Agent lists
-
Fiscal calendars
-
Time zones
-
Images Repository
-
SLA Policies
-
Security Policies
-
Authorization Policies
-
Shared Owner Policies
-
Workgroups
-
Validation Policies
By transferring objects to a repository, you can quickly revert to a previous repository version.
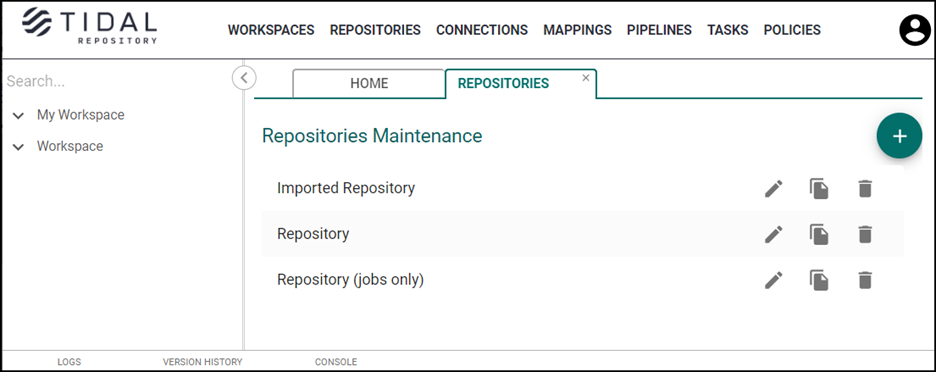
Repositories Listings on the Repositories Tab
To display repository listings on the Repositories tab:
-
Click Repositories in the Main menu.
-
Click the applicable repository from the list.
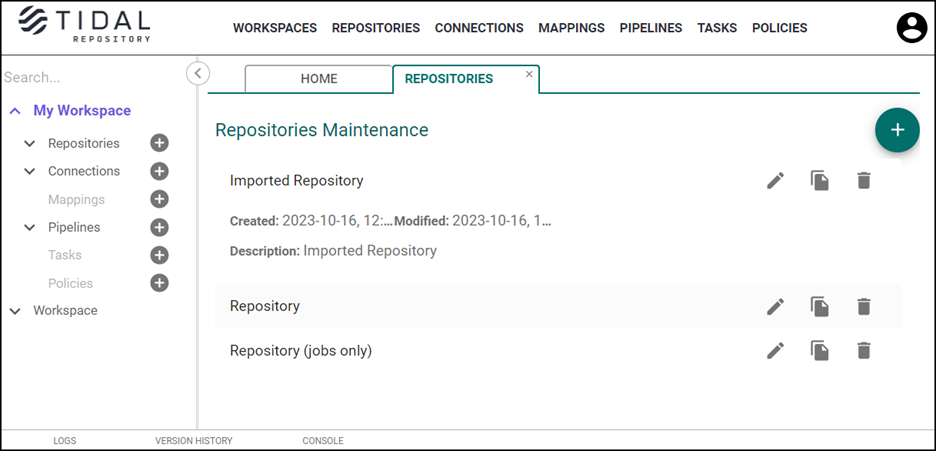
Viewing a Repository
To view the repository:
-
Expand the Repositories in the Workspaces pane to display a list of repositories.
-
Choose the applicable repository from the list.
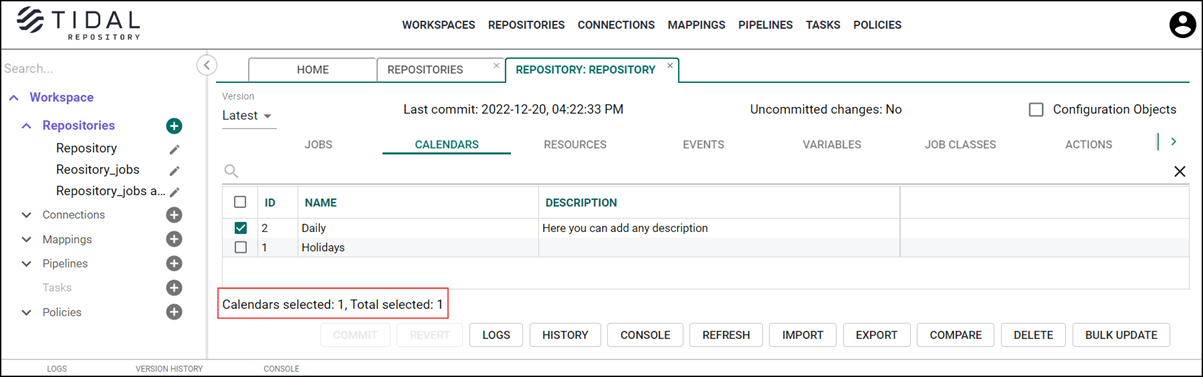
On the Repository tab, you can:
-
View version history
-
Compare repositories or their versions
-
Commit repository versions
-
Revert repository versions
-
View uncommitted repository changes
-
View Tidal Automation objects that exist in the repository, Tidal Repository supports all Tidal Automation object definitions (such as Jobs, Calendars, and Resources) as well as Tidal Automation administration objects (Authorization Policies, Security Policies, and Shared Owner Policies).
-
View the number of objects that you selected on the current tab (<Object> selected: ) as well as the total number of selected objects (Total selected: ) in the repository.
-
To view the administration objects, click the Configuration Objects checkbox:
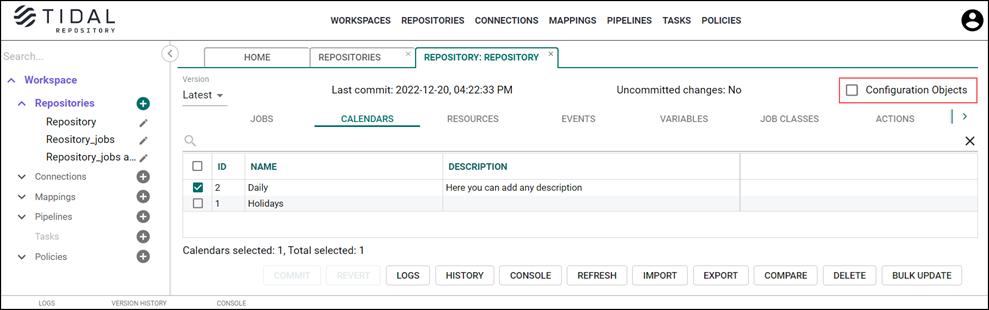
Note: To adjust a column width, drag the column separator next to the applicable header. The cursor changes its shape to a double-edged arrow.
Exporting a Repository
Note: To use the Export function, you must have Pull Repository permissions.
The Export function allows you to export some or all entity types for a designated repository. Upon successful completion of the export process, you can download your exported repository, as a zip file.
To export the repository:
-
Expand the Repositories list in the Workspaces pane and choose a repository to export. The contents of the Repository tab are displayed. In the list of Repositories displayed, choose the Repositories to be exported.
The Export function allows for repository versions to be designated and exported.
From the Version dropdown list on the Repository tab, choose the repository version you want to export. -
Click Export at the bottom of the screen.
-
Click an entity type to export from the Entities table.
-
Click Export to display the Select Entity Type for Export dialog. Choose applicable entity types.
-
Click Accept to initiate the export.
Use the Console (lower portion of the screen) to review the status of the export. Once the export runs successfully, a Successful status displays in the console. Find the applicable action buttons in the Actions field:
-
Details – Click to display task details (Level, Message, Date),
-
Download – Initiates downloading of the exported zip file.
-
Delete – Permanently removes the exported file from the server.
-
-
Click Download in the Actions field of the console to download a zip file containing the exported repository entity types. The zip file has the naming schema:
[repoId_version_timestamp.zip]
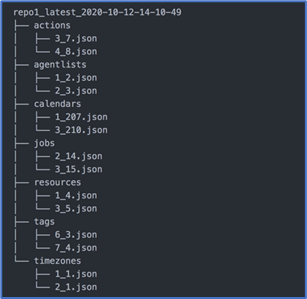
To use this file, extract its contents. An unzipped file has the structure:
[main folder / entity-type folders / json files] that can be described further as follows:
[main folder] – A name of the folder that contains all the entity types exported; default naming schema for this folder is [repoId_version_timestamp].
[entity-type folders] – Folders that contain exported entity-type files.
[json files] – Each JSON file is an object with its dependencies; note that each child object is a separate file.
Optionally, you can permanently remove the exported file from the server by selecting Delete in the top right corner of the console.
Importing a Repository
Note: To access Repository Import functionality, you must have Push Repository permission.
The Repository Import feature imports a previously exported repository.
Imports can be performed using zip files only. If you unzipped the exported file and worked with its contents, then zip it again before importing it.
You can find some useful information in JSON-file’s "key":value pairs – hashcode and trVersion.
Upon importing an exported file, the system compares hashcode values of the exported and imported files to determine if the file has been manually modified. If so, a warning in the console Task Details, "Import processor: The object [object_name] was manually changed," is displayed.
The trVersion parameter is shows the version of TR used. It is for your information only.
To import data:
-
Click a repository in the Workspaces pane.
-
Click Import.
-
Click one of the options if objects with the same name already exist in a repository in the Overwrite dialog:
-
Yes – Replaces the objects from a repository by the objects from a file.
-
No – Leaves the objects in a repository unaltered.
-
Cancel – Aborts the import.
-
-
Choose an applicable zip file from your system.
Note: The maximum file size for importing is 100 MB.
To view complete import information in the Actions field of the console, click Details for the line containing the Successful status.
Note: If you use the Tidal Repository version 1.3 or earlier and receive the “Maximum upload size exceeded” error while uploading a large data file, follow these steps:
-
Open the application.properties file and add the records:
spring.servlet.multipart.max-file-size=100MB
spring.servlet.multipart.max-request-size=100MB
server.tomcat.max-swallow-size=-1 -
Save and close the application.properties file.
-
Restart the TR service.
-
Open the application.properties file and add the records:
spring.servlet.multipart.max-file-size=100MB
spring.servlet.multipart.max-request-size=100MB
server.tomcat.max-swallow-size=-1 -
Save and close the application.properties file.
-
Restart the TR service.
-
Viewing Logs for the Repository
To view the logs:
-
Click View Logs at the bottom of the screen.
-
The logs contain information about the changes made, as well as when and by whom the changes were made.
Viewing Version History for the Repository
On the Repository tab, click Version History in the menu at the bottom of the screen. The Version History tab contains information about the changes made, as well as when and by whom the changes were made.
To view the version history:
-
Click the Version History tab in the Footer Status bar.
-
Choose the desired commit.
-
Click Edit.
-
Make changes and click Accept to apply them.
Deleting Objects from a Repository
Note: To use the Delete function, you must have Push Repository permissions. The Delete functionality allows you to remove the selected objects from the current version of the repository.
To remove the objects:
-
Choose items to be removed.
-
Click Delete.
Note: Delete is disabled if you attempt to delete already-committed objects from a previous version of the Repository
Adding a Repository
To add the repository:
-
Click Repositories in Main menu.
-
Click Plus on the Repositories tab.
-
Enter the Repository Name (required) and Description (optional) on the Add Repository tab.
-
Choose the policies you would like to be applied to the repository and specify either Must be met or May be met conditions for the policies. A policy is a business object that consists of rules that allow users to modify Tidal Automation jobs in either a repository or connection. See the Policies section to find more information.
-
Choose a repository owner (User/Workgroup) and repository owner’s name from the dropdown list.
Note: Owner is a designated user (non-LDAP or LDAP) or workgroup. Note that LDAP workgroups cannot own objects.
-
Using the Share/Public toggle, choose whether the repository is shared (access is limited to users you designate) or public (everyone can see the repository).
Share/Public toggle. Click Share to make the repository available to any users, workgroups, and LDAP groups.
If Public is selected, the repository is shared with all Tidal Repository users in the Read and Pull modes.
To share a repository with users, choose Share With and pick either the User, Workgroup, or LDAPGroup from the menu.
-
Click Save to add the configured repository.
Editing a Repository
To edit the repository:
-
Click Repositories in the Main menu.
-
Choose a repository that you want to change on the Repositories tab.
-
Click Edit.
-
Make your changes on the Edit Repository tab and then click Save to apply them.
Copying a Repository
Note: Make sure to clear the cache before using the copy functionality.
To copy the repository:
Note: You must have the permission to edit a repository. If you have view-only permissions, the Copy button next to the repository will be disabled.
-
Click Repositories on the Main menu.
-
Click Copy on the Repository tab for the repository that you want to copy.
-
Check the Copy all checkbox in the Copy dialog if you want to copy all objects stored in the repository.
Note: While copying, the repository will be locked. It means you cannot modify this repository while it is being copied.
-
Click Accept in the Copy dialog to confirm your action.
Once you copied the repository, it appears in the list on the Repositories tab, so you can modify it.
Note: The user who initiates the Copy process is now the owner of the copied repository.
Deleting a Repository
To remove the repository:
-
Click Repositories in the Main menu.
-
Click Delete on the Repositories tab for the repository to be removed.
-
Click Accept in the Remove dialog to confirm your action. The message, “Deleted Successfully”, displays.
Viewing Uncommitted Repository Changes
If the Uncommitted changes label (on right side of the Repository screen, parallel to the Last commit field) is “No”, it indicates that there are no uncommitted changes.
-
The Uncommitted changes:No label occurs when:
-
All changes are already committed and saved as a version.
-
The latest version is the same as the previous version committed.
-
There are no objects in the repository.
-
When you modify the objects (for example, update, export the objects or pull the objects to a repository), the Uncommitted Changes label appears in blue. It means there are uncommitted repository changes.
The number of uncommitted changes shows next to the Uncommitted Changes label and next to the object type title.
Note: There may be a brief pause before all pulled objects appear and the number next to the Uncommitted Changes label changes.
When changes you have made are not committed, data can be lost. For example, if jobs with the same names but different rules are moved to your repository, these jobs are overwritten.
By committing the changes, you save the current repository state to the database. You can easily restore your data or revert to the previous version of the repository.
-
Click Uncommitted changes (when the label appears in green). A tab containing the latest uncommitted and committed versions displays.
Revert to Repository Version
To revert the version:
-
Click a repository version in the View Repository screen. The Latest repository state is the most recent uncommitted version. Because you cannot revert a repository in this case, Revert is disabled.
-
Click Revert.
-
If there are uncommitted changes, a message displays, "Do you want to commit the uncommitted changes?".
-
Click Yes to display the Commit screen. When changes are committed, the selected version becomes the latest version.
-
If you click No, the selected version becomes the latest version and uncommitted changes are lost.
-
If there are no uncommitted changes, the Revert Confirmation screen displays a message, “Revert Latest version to selected version?”
-
-
Click Accept. The latest version is reverted to the selected version. The repository is not reverted if you click Cancel.